
Kubernetes Fundamentals
Introduction
In this tutorial, we will explore the configuration of AWS Elastic File System (EFS) for use with EC2 instances and Kubernetes clusters. This step is crucial for ensuring data persistence in containerized environments and forms a foundational element for our upcoming real-world application deployments.
Context
Throughout our previous series on deploying single-node Kubernetes clusters (Parts 1-5), we focused on cluster setup and configuration. Now, we’re transitioning to practical application deployment, with a particular emphasis on data persistence.
Key Points
1. Platform Agnosticism: It’s important to note that Kubernetes commands and deployment strategies remain consistent across various platforms, whether you’re using different operating systems, cloud providers, or even bare metal infrastructure.
2. Data Persistence in Containerized Environments:
One of the critical challenges in container deployments is maintaining data persistence. Regardless of the application, it’s essential to ensure that underlying data remains intact, even in scenarios such as:
- Container failures.
- Cluster deletions and redeployments.
- System migrations.
3. Role of AWS EFS: AWS EFS provides a scalable, highly available file system that can be seamlessly integrated with EC2 instances and Kubernetes clusters. It offers:
- Persistent storage across container lifecycles
- Shared access to data from multiple EC2 instances
- Automatic scaling to accommodate growing data volumes
Objective
By the end of this tutorial, you will have a solid understanding of how to configure AWS EFS for use with your Kubernetes deployments. This knowledge will serve as a crucial foundation for deploying and managing stateful applications in containerized environments.
Next Steps
We will walk through the step-by-step process of setting up AWS EFS, integrating it with EC2 instances, and preparing it for use with Kubernetes persistent volumes. This setup will pave the way for our subsequent tutorials on deploying real-world applications in Kubernetes with robust data persistence strategies.
Understanding Data Persistence in Kubernetes
Data persistence in Kubernetes refers to the ability to maintain data beyond the lifecycle of individual pods or containers. This is achieved through two key API resources:
1. PersistentVolumes (PVs):
- Cluster-level storage resources
- Provisioned by administrators or dynamically via Storage Classes
- Independent lifecycle from individual pods
- Implements various storage backends (NFS, iSCSI, cloud-provider solutions)
2. PersistentVolumeClaims (PVCs):
- User requests for storage
- Consumes PV resources
- Can specify size and access modes (ReadWriteOnce, ReadOnlyMany, ReadWriteMany)
For a comprehensive overview of Kubernetes storage options, refer to the Mirantis blog on persistent data and storage with Kubernetes.
AWS Elastic File System (EFS) for Kubernetes Deployments
In our Kubernetes deployments, we have chosen AWS EFS as our distributed storage solution.
Key Advantages of AWS EFS
1. Data Sharing Across Nodes:
- Ensures data availability even if individual nodes fail
- Critical for DevOps and microservices architectures
2. Consistency Across Replicas:
- Maintains data consistency for multiple pod replicas
- Updates are immediately visible across all nodes
3. Cost-Effective:
- Pay-as-you-go pricing model
- No upfront costs or minimum fees
4. Simplicity:
- Serverless, “set-and-forget” file system
- Minimal management overhead
5. Scalability:
- Automatically scales with data growth
- No need to provision storage in advance
6. High Availability:
- Data persists even if pods are terminated or the entire cluster is deleted
7. Flexibility:
- Supports various access patterns and throughput levels
Implementation Strategy
In our Kubernetes deployments:
- AWS EFS stores all Kubernetes deployment files (configurations) and pod data
- EBS (Elastic Block Storage) is used only for operating system files
- This approach ensures data persistence and availability, even in case of node failures
By leveraging AWS EFS, we create a resilient, scalable, and cost-effective storage solution for our Kubernetes deployments. This strategy aligns with best practices for cloud-native applications, ensuring data persistence, high availability, and seamless scalability across our Kubernetes ecosystem.
Configuring AWS EFS for Kubernetes
Step 1: Creating an Amazon EFS File System
1. Access the AWS Console:
- Log in to your AWS account.
- Navigate to the Services tab at the top.
- Select EFS from the list.
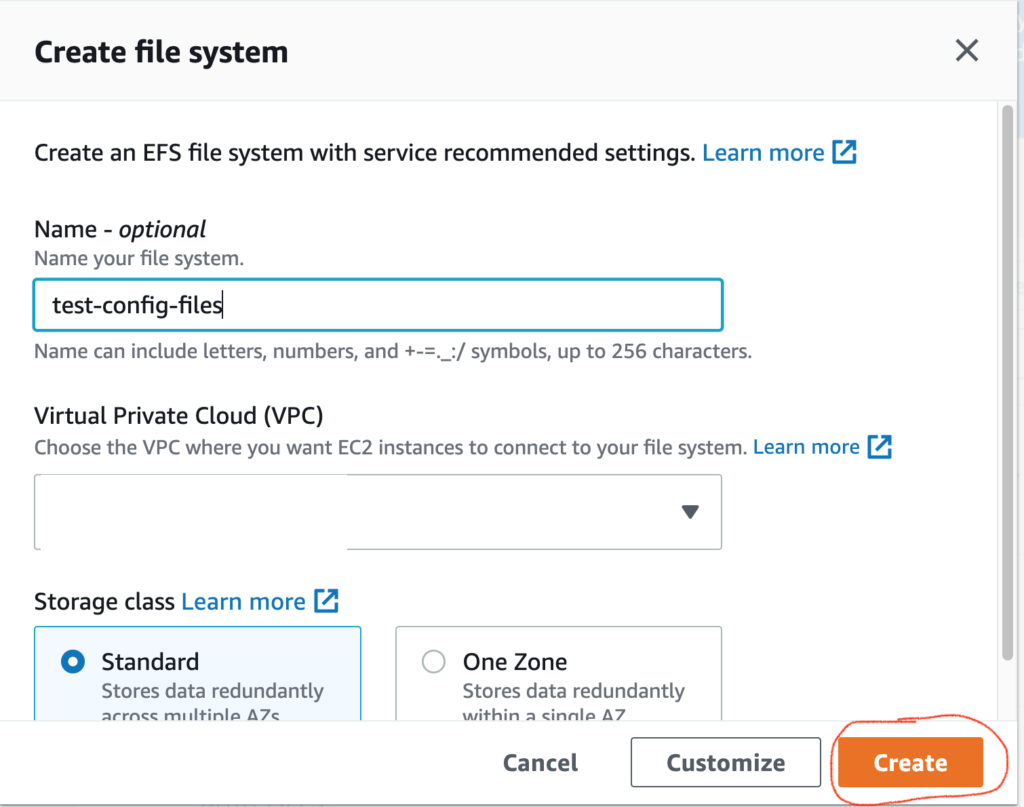
2. Create a New File System:
- Click the Create file system button.
- In the dialog box that appears:
- Name: Provide a descriptive name (e.g., “test-config-files”).
- VPC: Choose the appropriate Virtual Private Cloud (VPC) from the dropdown.
- Storage class:
- Select Standard (for data across multiple availability zones).
- Or choose One Zone (for data stored in a single availability zone).
3. Click Create to create your EFS file system.
Below is the screenshot of the “Create file system” tab
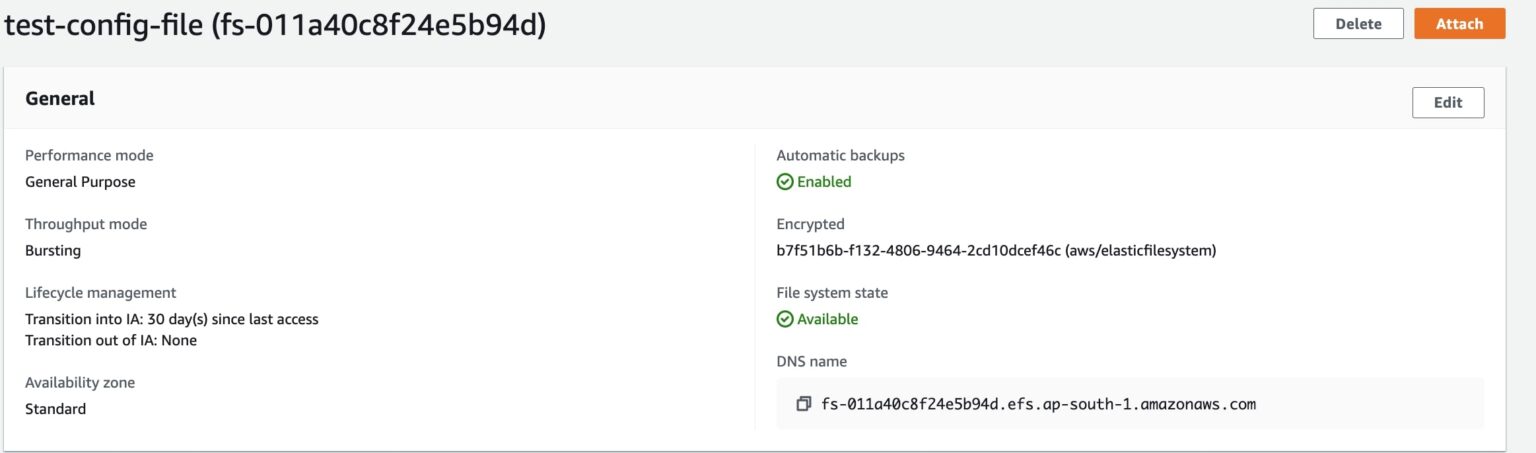
This creates an EFS as shown below.

Before mounting the EFS on an EC2 instance, ensure that port “2049” of type=NFS is enabled on the security group attached to the EC2 instance.

1. Access the EFS Console:
- Navigate to the Elastic File System service.
- Click on the File systems tab.
2. Select Your File System:
- Locate the EFS file system you created (e.g., “test-config-files”).
- Click on it to open the details.
3. Attach to an EC2 Instance:
- In the top-right corner, click on Attach.
- Follow the instructions to mount the EFS file system on your EC2 instance.
Below is the screenshot of the EFS page
Step 2: Mounting Amazon EFS on an EC2 Instance
Follow these steps to mount an Amazon Elastic File System (EFS) on your EC2 instance:
1. Log in to the EC2 Instance:
- Access your EC2 instance via SSH.
2. Install the “nfs” Utility:
- Ensure the “nfs” utility is installed:
- On CentOS 7:
$ sudo yum install -y nfs-utils
- On Ubuntu:
$ sudo apt install nfs-common -y
3. Create a Mount Point:
- Choose a directory for mounting the EFS. For example:
$ cd ~
$ mkdir test
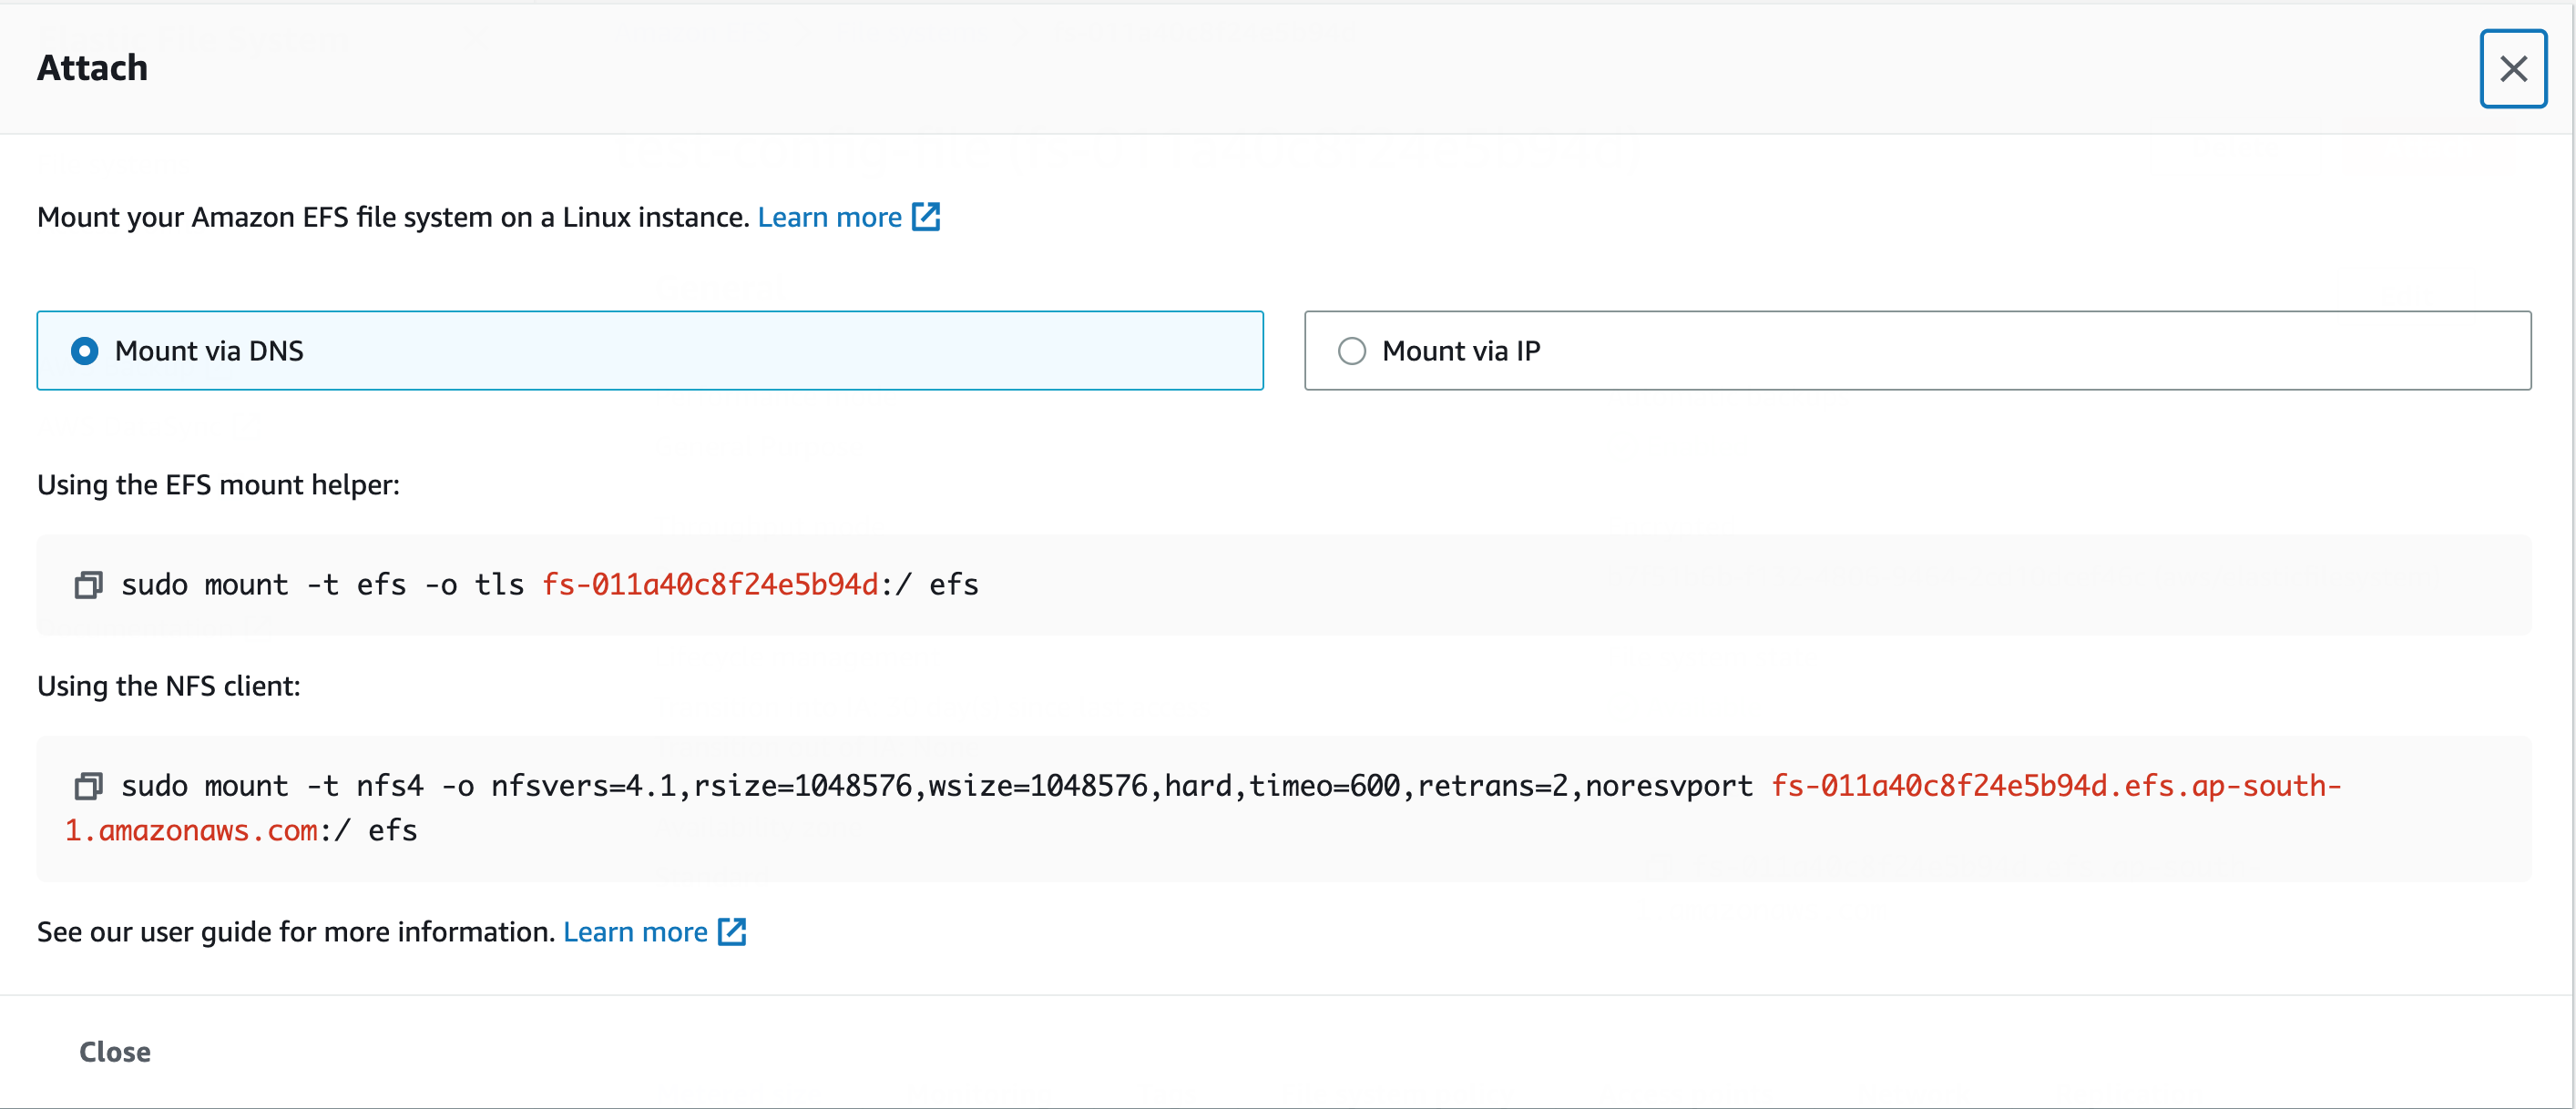
4. Mount the EFS:
- Use the mount command provided by the EFS console (replace “test” with your chosen directory):
$ sudo mount -t nfs4 -o nfsvers=4.1,rsize=1048576,wsize=1048576,hard,timeo=600,retrans=2,noresvport fs-011a40c8f24e5b94d.efs.ap-south-1.amazonaws.com:/ test
- Note: Exclude the trailing forward slash (“/”) in the mount command.
5. Verify the Mount:
- Check the mount status:
$ df -k
- You should see output similar to:
fs-011a40c8f24e5b94d.efs.ap-south-1.amazonaws.com:/ 9007199254739968 0 9007199254739968 0% /home/jenkins/test
6. Permanent Mount (Optional):
- To mount EFS after reboots, update the “/etc/fstab” file:
$ sudo vi /etc/fstab
- Add the following entry (adjust the path as needed):
fs-011a40c8f24e5b94d.efs.ap-south-1.amazonaws.com:/ /home/jenkins/test nfs4 defaults 0 0
- Save the file.
7. Unmounting EFS:
- To unmount EFS from the directory:
$ sudo umount test
By using shared storage (EFS) across nodes (Master and Worker), you can deploy Kubernetes applications seamlessly.
This tutorial completes the process of creating and mounting an EFS on an EC2 instance. The data stored on this EFS can now be shared across instances.
Comments are closed.