
KUBERNETES FUNDAMENTALS
DEPLOYING A SINGLE-NODE KUBERNETES CLUSTER ON AWS
A COMPREHENSIVE GUIDE
Introduction
In the previous part of this 5-part blog, we configured the SSH port in the default security group and created a key pair for EC2 instance access.
Now, let’s proceed with the next steps:
1. Select the Appropriate CentOS 7 AMI:
- Choose an Amazon Machine Image (AMI) for CentOS 7. Ensure it meets your requirements and is compatible with your use case.
2. Choose the EC2 Instance Type:
- For our initial OS configuration, we recommend using an “t2.micro” instance type. Adjust the instance type based on your specific needs and workload.
By following these steps, you’ll set up the foundation for your Kubernetes cluster. In the next part, we’ll dive into CentOS 7 base OS installation.
Part 2
Selecting CentOS 7 AMI and EC2 Instance Type
Step 1: Install and Configure the OS (CentOS 7)
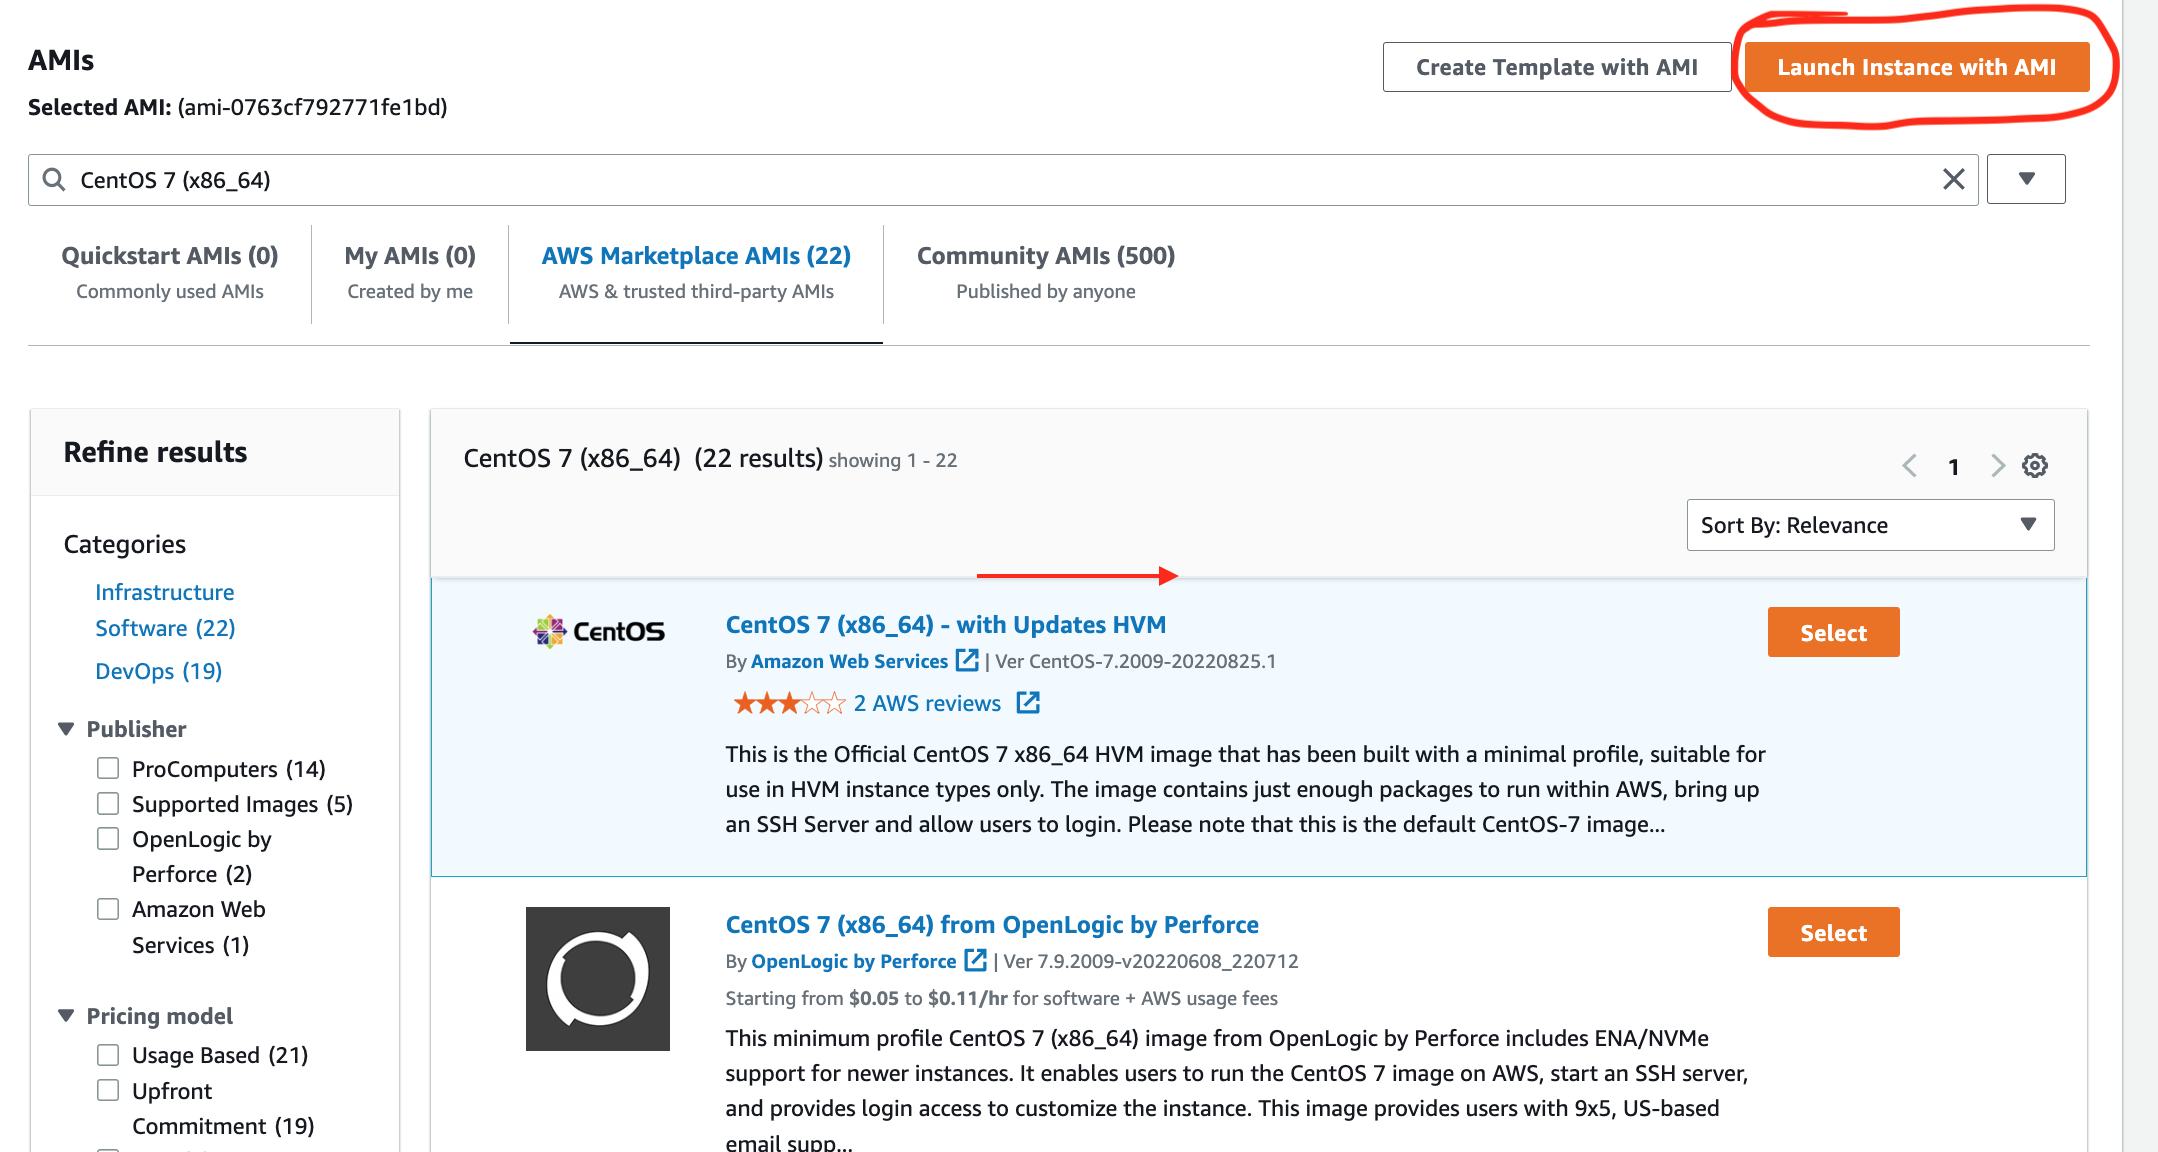
1. Select the Appropriate CentOS 7 AMI:
- Go to the EC2 page.
- In the left tab, click Images > AMI Catalogue.
- Search for “CentOS 7 (x86_64)”.
- Choose the CentOS 7 AMI that is marked as Free Tier (you won’t be charged for using this AMI).
2. Launch the Instance:
- Click Launch Instance with AMI.
- Configure the following settings:
- Name and Tags: Set the name to “base-os” (you can choose any name).
- Application and OS Images (Amazon Machine Image): Select the CentOS 7 AMI you chose earlier.
- Instance Type: Choose “t2.micro” (for initial OS setup).
- Key Pair (Login): Use the “jenkins” key pair created in Step 1.
- Network Settings: Use default VPC settings, no preference for subnet, and enable auto-assign public IP.
- Firewall (Security Groups): Select the existing security group named “default” (configured with SSH port in Step 2).
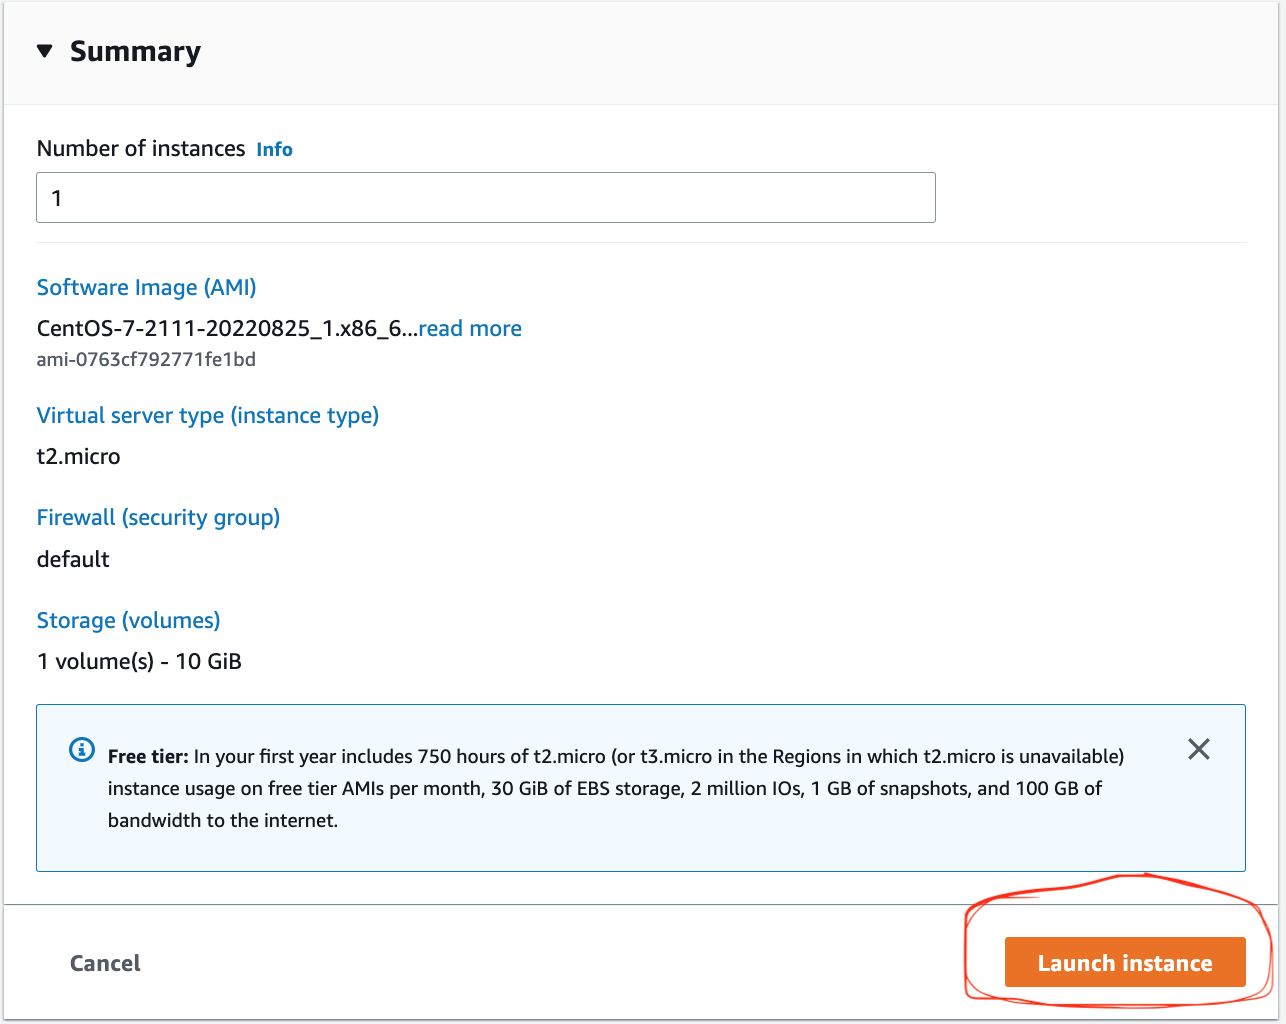
3. Configure Storage and Advanced Details:
- No additional configurations are required here.
4. Summary:
Review your settings and click Launch Instance.
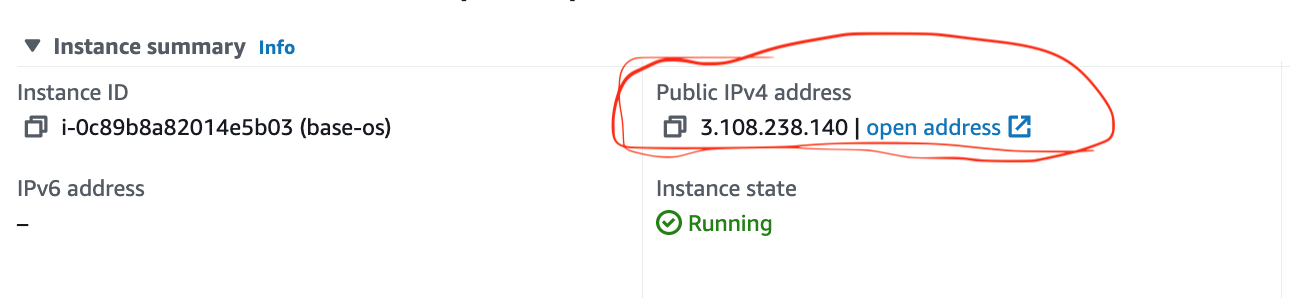
5. SSH Log in to the EC2 Instance:
- Wait for the instance to be in a running state.
- Note down the public IP address.
- Use SSH to log in to the EC2 instance as the “centos” user (using the “jenkins.pem” key pair).
- On your local macOS terminal:
- Navigate to the directory where “jenkins.pem” is located.
- Run:
$ chmod 400 jenkins.pem- SSH into the instance:
$ ssh ubuntu@52.66.233.40 -i jenkins.pem
- Type “yes” at the prompt.
- You’re now logged in as the “centos” user.
6. Create a New User:
- We’ll create a new user named “jenkins” who will be the administrator for Docker and Kubernetes.
$ sudo useradd jenkins
- We avoid using the default “centos” user due to security risks and lack of a password.

Step 2: Creating a New User for Docker and Kubernetes Administration
In this step, we’ll create a new user named “jenkins” who will be responsible for managing Docker and Kubernetes. Follow these instructions on your EC2 instance:
1. Switch to Root User:
- Log in as the root user to perform administrative tasks.
2. Create the “jenkins” User:
- Create a new user named “jenkins” with a strong password (e.g., “12345678”):
# useradd jenkins
# passwd jenkins
3. Set Up SSH Access for “jenkins”:
- Switch to the “jenkins” user:
# sudo su - jenkins
- Create an
.sshdirectory and set appropriate permissions:$ mkdir .ssh $ chmod 700 .ssh
- Inside the
.sshdirectory, create anauthorized_keysfile and paste the output of the SSH key generated in Part 1 of this blog:$ vi authorized_keys $ chmod 600 authorized_keys
4. Add “jenkins” to Necessary Groups:
- Log out from the EC2 instance and log in as the “centos” user.
- Add the “jenkins” user to the “wheel” and “adm” groups:
$ sudo usermod -aG wheel jenkins
$ sudo usermod -aG adm jenkins
5. Modify User IDs (UID and GID):
- Log out from the “jenkins” user and log in as the “centos” user.
- Change the “centos” user’s UID and GID to 2000:
$ sudo usermod -u 2000 centos
$ sudo groupmod -g 2000 centos
- Change the “jenkins” user’s UID and GID to 1000:
$ sudo usermod -u 1000 jenkins
$ sudo groupmod -g 1000 jenkins
6. Ready for Installation and Configuration:
- From now on, perform all installation and configuration tasks using the “jenkins” user.
Step 3: Creating an AMI of the Base OS
Creating an AMI allows you to use this instance as a template for future CentOS 7 base operations. Follow these steps:
1. How to Create an AMI:
- Go to the EC2 page.
- Click on the instance you want to create an AMI from.
- In the “Actions” tab, select “Image and template” > “Create image”.
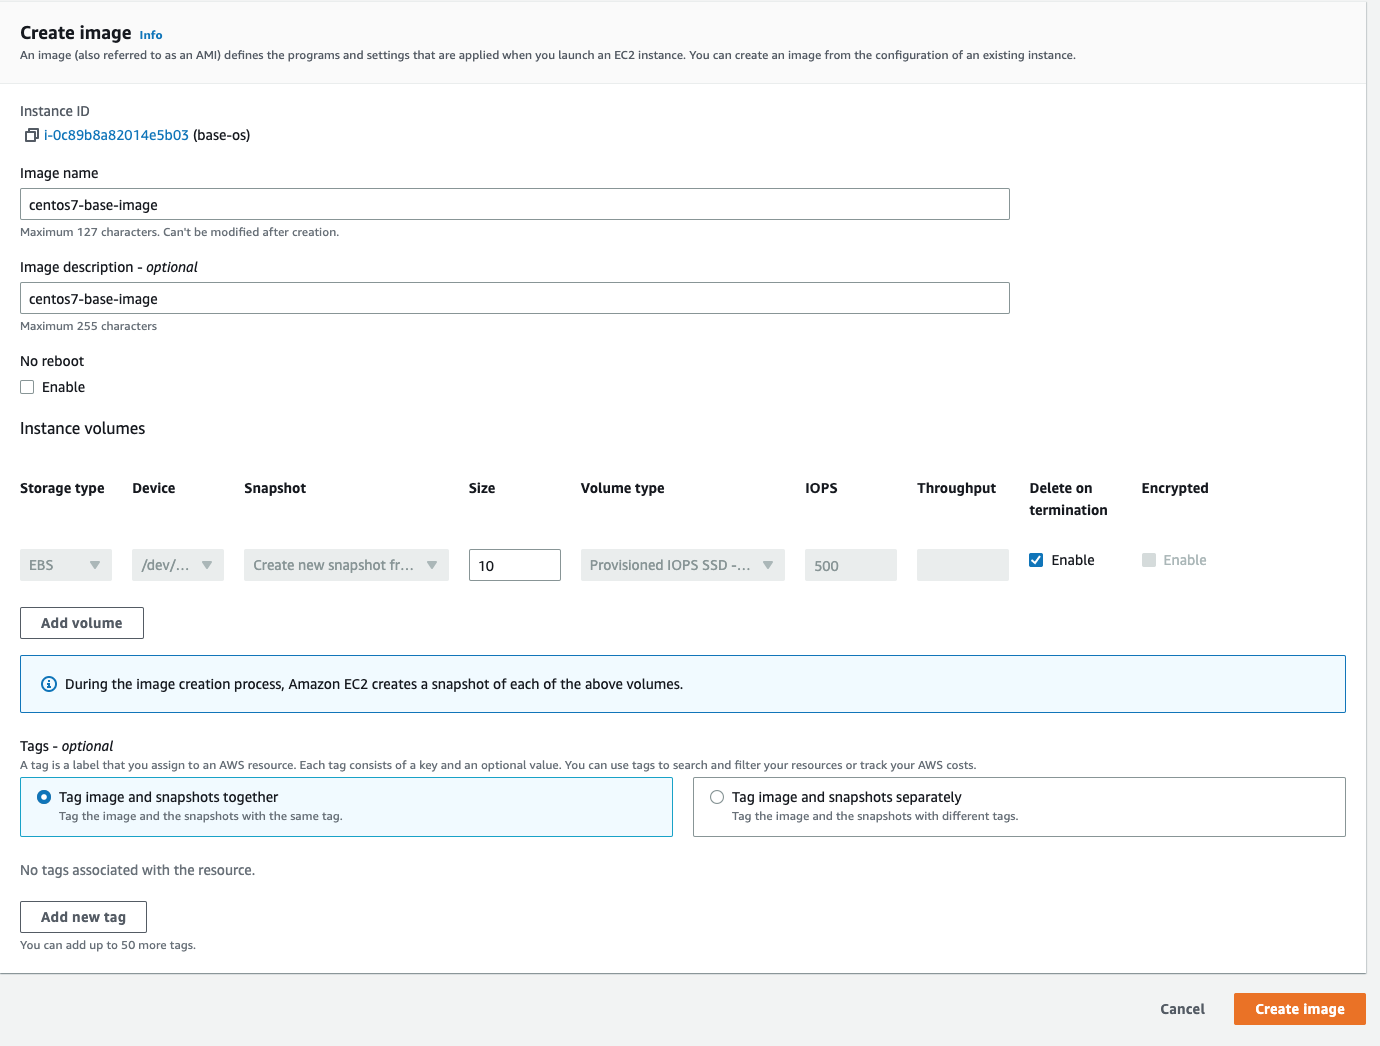
2. Configure the Image:
- In the new window, update the following parameters:
- Image name: Enter a suitable name (e.g., “centos7-base-image”).
- Image description: Provide a brief description (e.g., “CentOS 7 base image”).
- Click the “Create image” button.
3. Completion:
You’ve successfully created an AMI of the CentOS 7 base OS. You can now use this image for future instances.
Below is a screenshot of the AMI creation page.
This completes the CENTOS-7 base-os installation.
Part 3