KUBERNETES FUNDAMENTALS
Introduction
Welcome to Part 2 of our comprehensive 5-part tutorial series. In Part 1, we successfully set up the CentOS-7 system and configured our Dockerfile. Building upon that foundation, this segment will guide you through two critical processes.
1. Creating a Docker image using the Dockerfile we configured in Part 1
2. Pushing this Docker image to two distinct container registries:
- Amazon Elastic Container Registry (ECR)
- Docker Hub
Key Concepts
Amazon ECR: A fully-managed Docker container registry provided by AWS, offering secure, scalable, and reliable storage for Docker images.
Docker Hub: Docker’s own cloud-based registry service for container images, facilitating easy sharing and access to a vast repository of container images.
The Dual Registry Approach
While it’s common practice to push container images to a single registry, our tutorial demonstrates pushing to both ECR and Docker Hub. This approach serves two purposes:
- It provides you with the knowledge and flexibility to work with different registry options.
- It ensures that when deploying the remote-host container on a Kubernetes cluster, you can pull the image from either source based on your specific needs or preferences.
Note: In real-world scenarios, you would typically choose one registry based on your project requirements, infrastructure setup, and organizational policies.
By the end of this part, you’ll have a clear understanding of how to create and distribute Docker images across different registry platforms, enhancing your skills in container management and deployment strategies.
Let’s begin with the creation of our Docker image and its subsequent distribution to these powerful container registries.
Part 2
Docker Image Creation and Registry Push
Step 4: Building and Tagging Docker Images
To create the “remote-host” container, follow these steps:
1. Build the Container:
- Navigate to the directory containing your Dockerfile.
- Run the following command:
docker build -f Dockerfile -t remote-host .This command builds a new “remote-host” container.
2. Tag the Container:
- Tagging allows you to manage different versions of the container.
- Use the following commands to tag your container:
docker tag remote-host remote-host:1.1
docker tag remote-host remote-host:latest
Replace the version numbers (e.g., “1.1”) with your desired tags.
3. View Created Images:
- To see the Docker images you’ve created, run:
docker images
- The “IMAGE ID” remains the same for both containers; only the tags differ.
Remember to execute these commands in the same directory as your Dockerfile.
The above command will show the docker images that you have created
REPOSITORY TAG IMAGE ID CREATED SIZE
remote-host 1.1 51ec9bc20270 5 months ago 110MB
remote-host latest 51ec9bc20270 5 months ago 110MB
Note: The “IMAGE ID” highlighted above is the same for both containers, only the tags are different.
Step 5: Creating an AWS IAM User
Follow these steps to create a new user in AWS IAM:
1. Log in to the IAM Console:
- Access the AWS Identity and Access Management (IAM) console.
- Navigate to the “Users” section.
2. Create a New User:
- Click “Add user.”
- Enter a username (e.g., “remote_host”) for the new user.
- Choose the access type (programmatic access, AWS Management Console access, or both).
3. Set Permissions:
- Assign permissions to the user. You can create a custom policy or attach existing policies.
- For security best practices, grant the least privilege necessary for the user’s tasks.
4. Review and Create:
- Review the user details and permissions.
- Click “Create user.”
Remember to replace “remote_host” with your desired username.
User Creation for Demonstration Purposes
For the purposes of this tutorial, we have created a new IAM user named “remote_user”. This decision was made to clearly differentiate from the existing “remote_host” user and to provide a fresh example for illustrative purposes.
IAM User Creation Process
The following screenshots document the step-by-step process of creating the new IAM user in AWS. These images serve as a visual guide to complement the written instructions, ensuring clarity and ease of replication for readers following this tutorial.
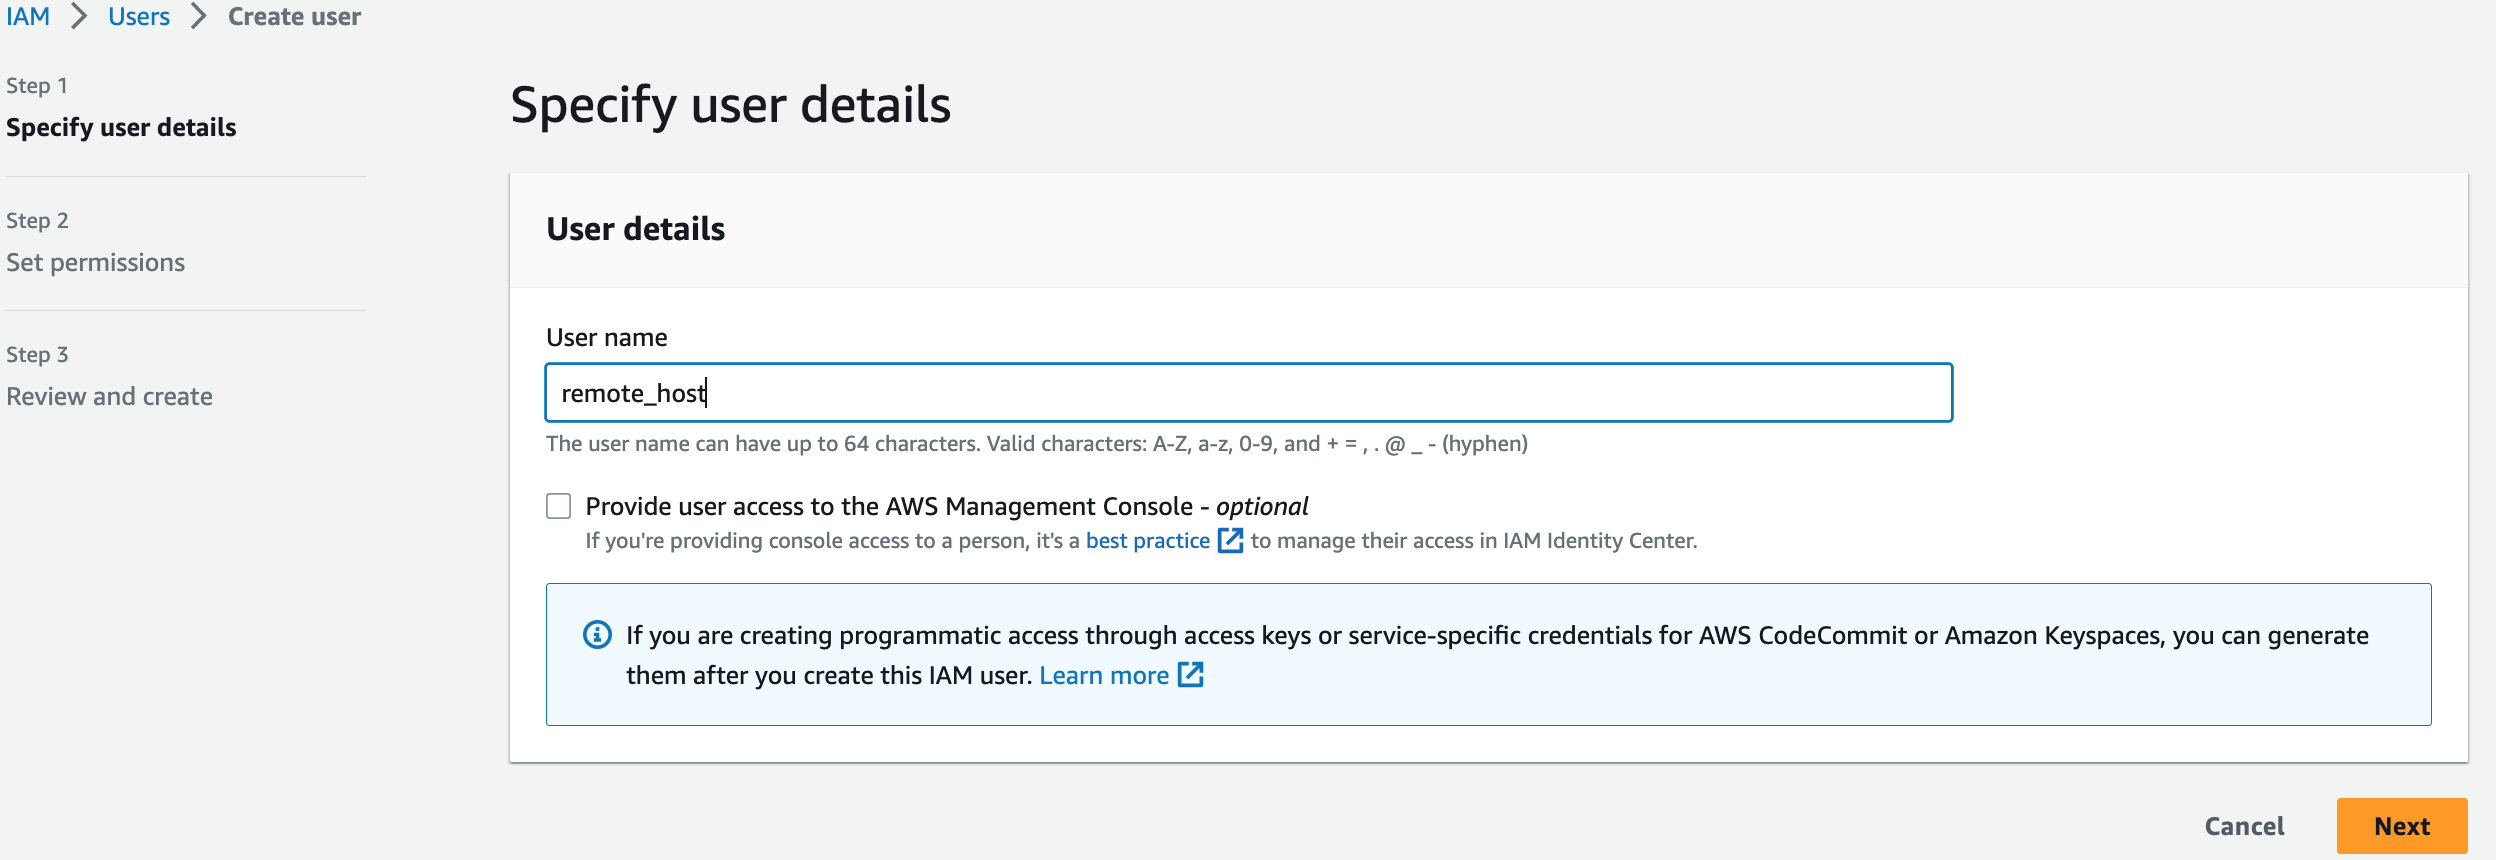
Click “Next”
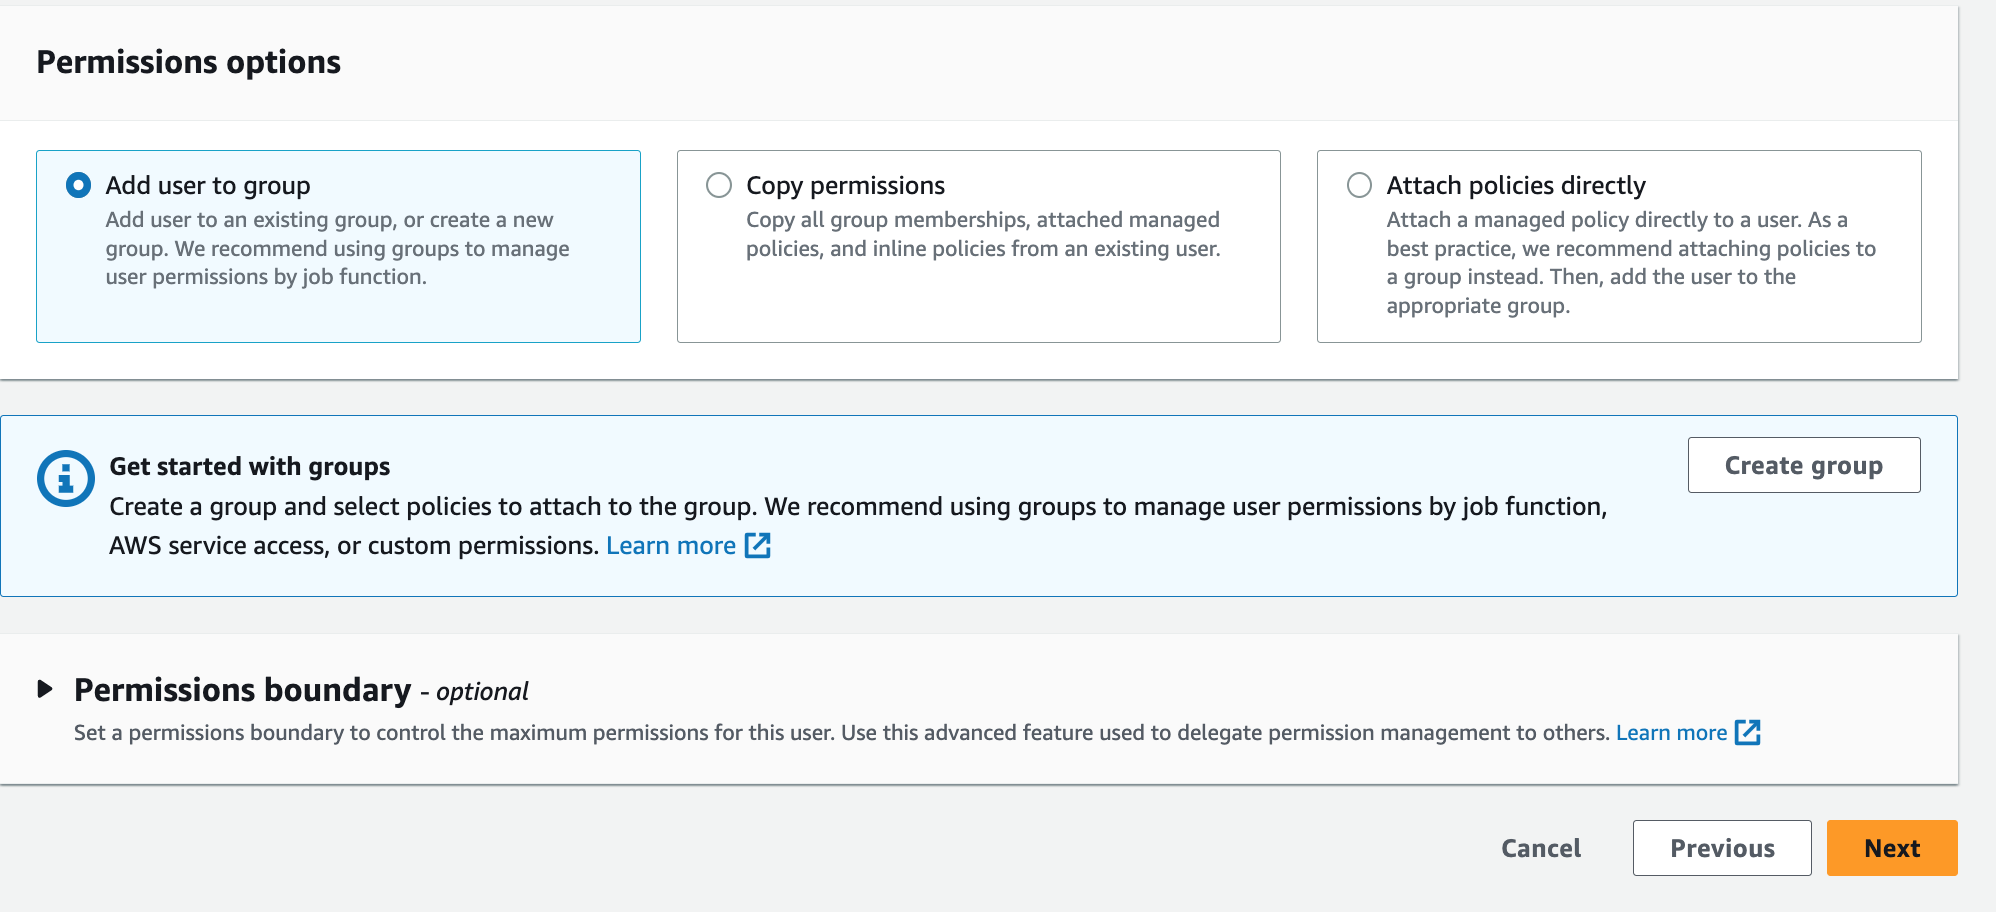
Click “Next“
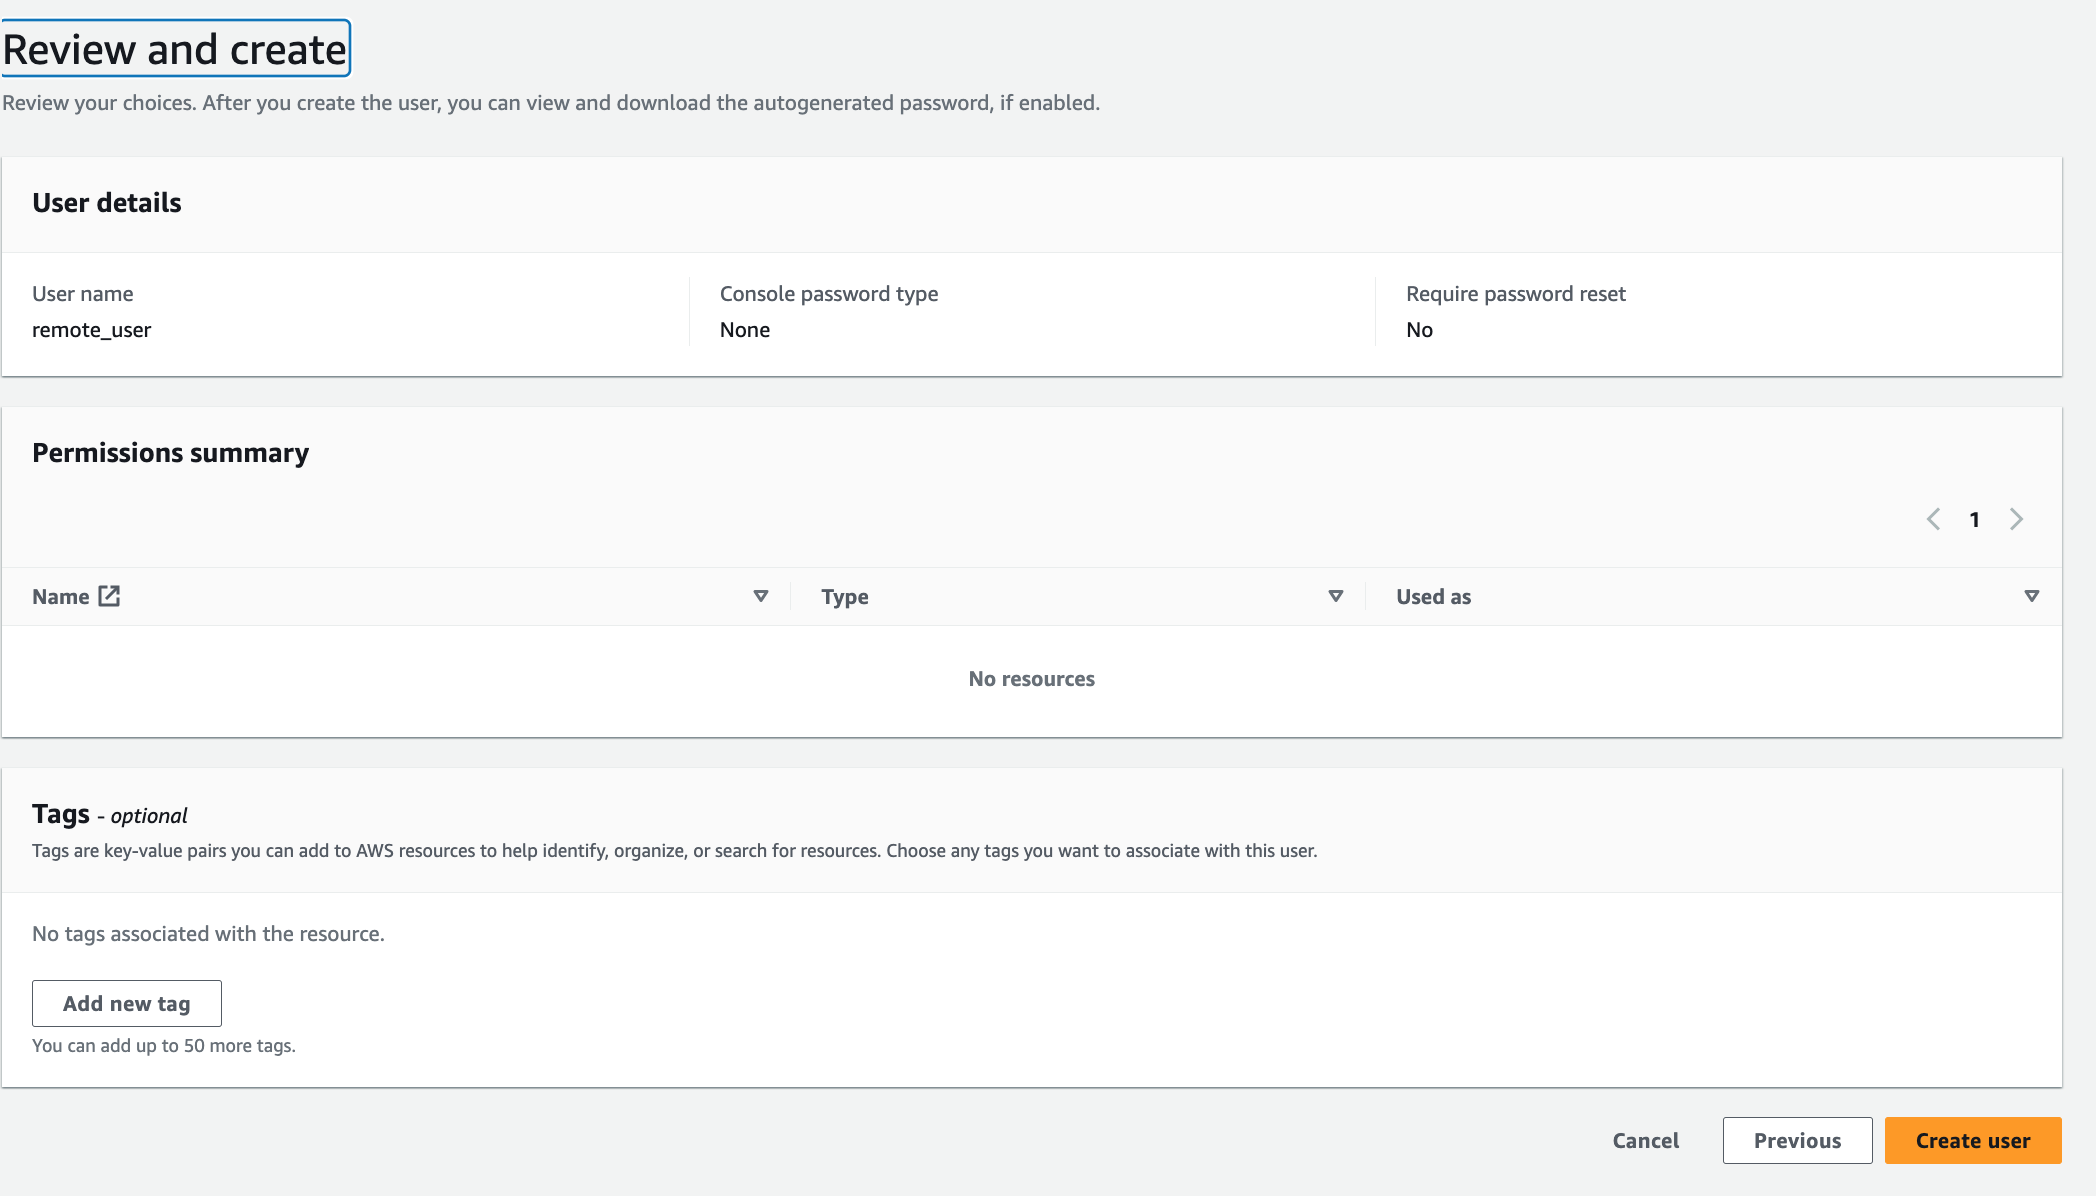
Click “Create user“
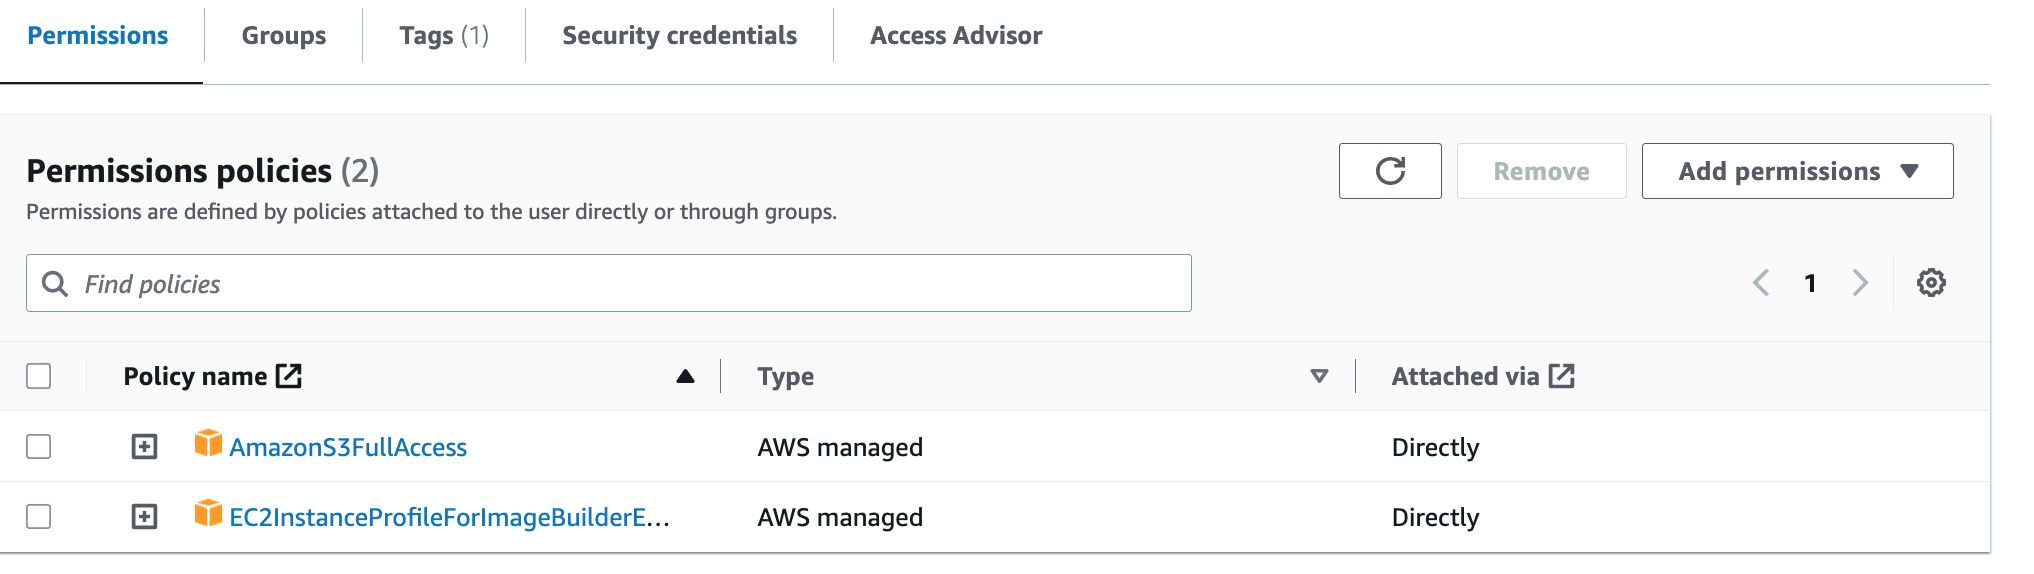
Assign 2 policies to this user:
S3FullAccess to take backups
ECR policy to use ECR repos
Next, download the access/secret keys for this user and store these carefully for future use. This action happens ONLY once, so make sure that you keep the downloaded “csv” file carefully.
By creating a new user, we can demonstrate the entire process from start to finish, allowing readers to follow along without any potential confusion that might arise from using a pre-existing account. This approach also reinforces best practices in access management and security by showcasing the creation of purpose-specific users.
As we proceed, we will use this newly created “remote_user” account to illustrate subsequent steps in our AWS ECR interaction and Docker image push processes.
Step 6: Authenticate the user using awscli.
Below are the instructions for authenticating the user using awscli on the Docker creator EC2 instance:
1. Open your terminal on the Docker creator EC2 instance.
2. Run the following command:
aws configure3. When prompted, enter the details from the “csv” file you downloaded after creating the “remote_host” user:
- AWS Access Key ID:
<Access-ID>- AWS Secret Access Key:
<Secret-key>- Default region name:
ap-south-1(or your preferred region)
Remember to replace
<Access-ID>and<Secret-key>with the actual values from the “csv” file.
Step 7: Create AWS ECR and push the image to the registry.
Below are instructions for creating an AWS ECR repository and pushing the image to the registry:
1. Create an ECR Repository:
- In your AWS Management Console, navigate to Amazon Elastic Container Registry (ECR).
- Click “Create repository.”
- Choose a repository name (e.g., “remote-host”) and set “Tag immutability” to disabled.
2. Authenticate Docker with ECR: Run the following command to authenticate Docker with ECR:
aws ecr get-login-password --region ap-south-1 | docker login --username AWS --password-stdin 123456789012.dkr.ecr.ap-south-1.amazonaws.com
3. Build and Tag the Image:
- If needed, rebuild the image in the directory where your Dockerfile exists:
docker build -t remote-host .
- Create image tags for both “latest” and version “1.1”:
docker tag remote-host:latest 123456789012.dkr.ecr.ap-south-1.amazonaws.com/remote-host:latest
docker tag remote-host:latest 123456789012.dkr.ecr.ap-south-1.amazonaws.com/remote-host:1.1
4. Push Images to ECR: Push the images to ECR:
docker push 123456789012.dkr.ecr.ap-south-1.amazonaws.com/remote-host:latest
docker push 123456789012.dkr.ecr.ap-south-1.amazonaws.com/remote-host:1.1
Remember to replace
<Access-ID>and<Secret-key>and “123456789012” with your “AWS account-id” with the actual values from the file.
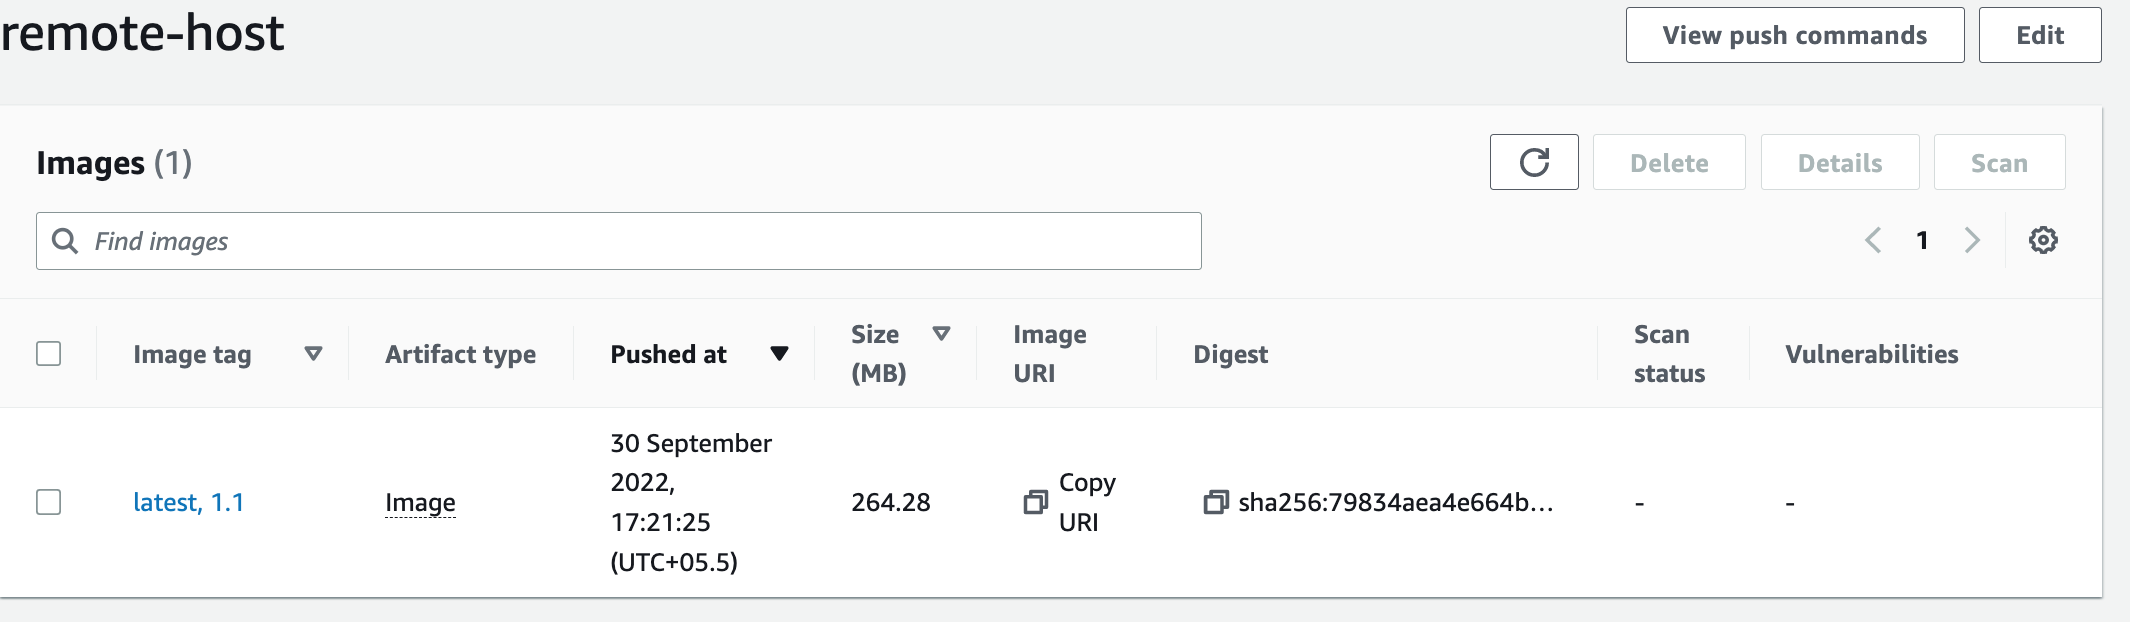
Upon refreshing your AWS ECR repository, the image below will be visible.
Step 8: Create a Docker hub account and push the image to docker-hub.
Follow these instructions for creating a Docker Hub account and pushing the image to Docker Hub:
1. Create a Docker Hub Account:
- If you don’t have a Docker Hub account, visit Docker Hub and sign up.
- If you already have an account, log in.
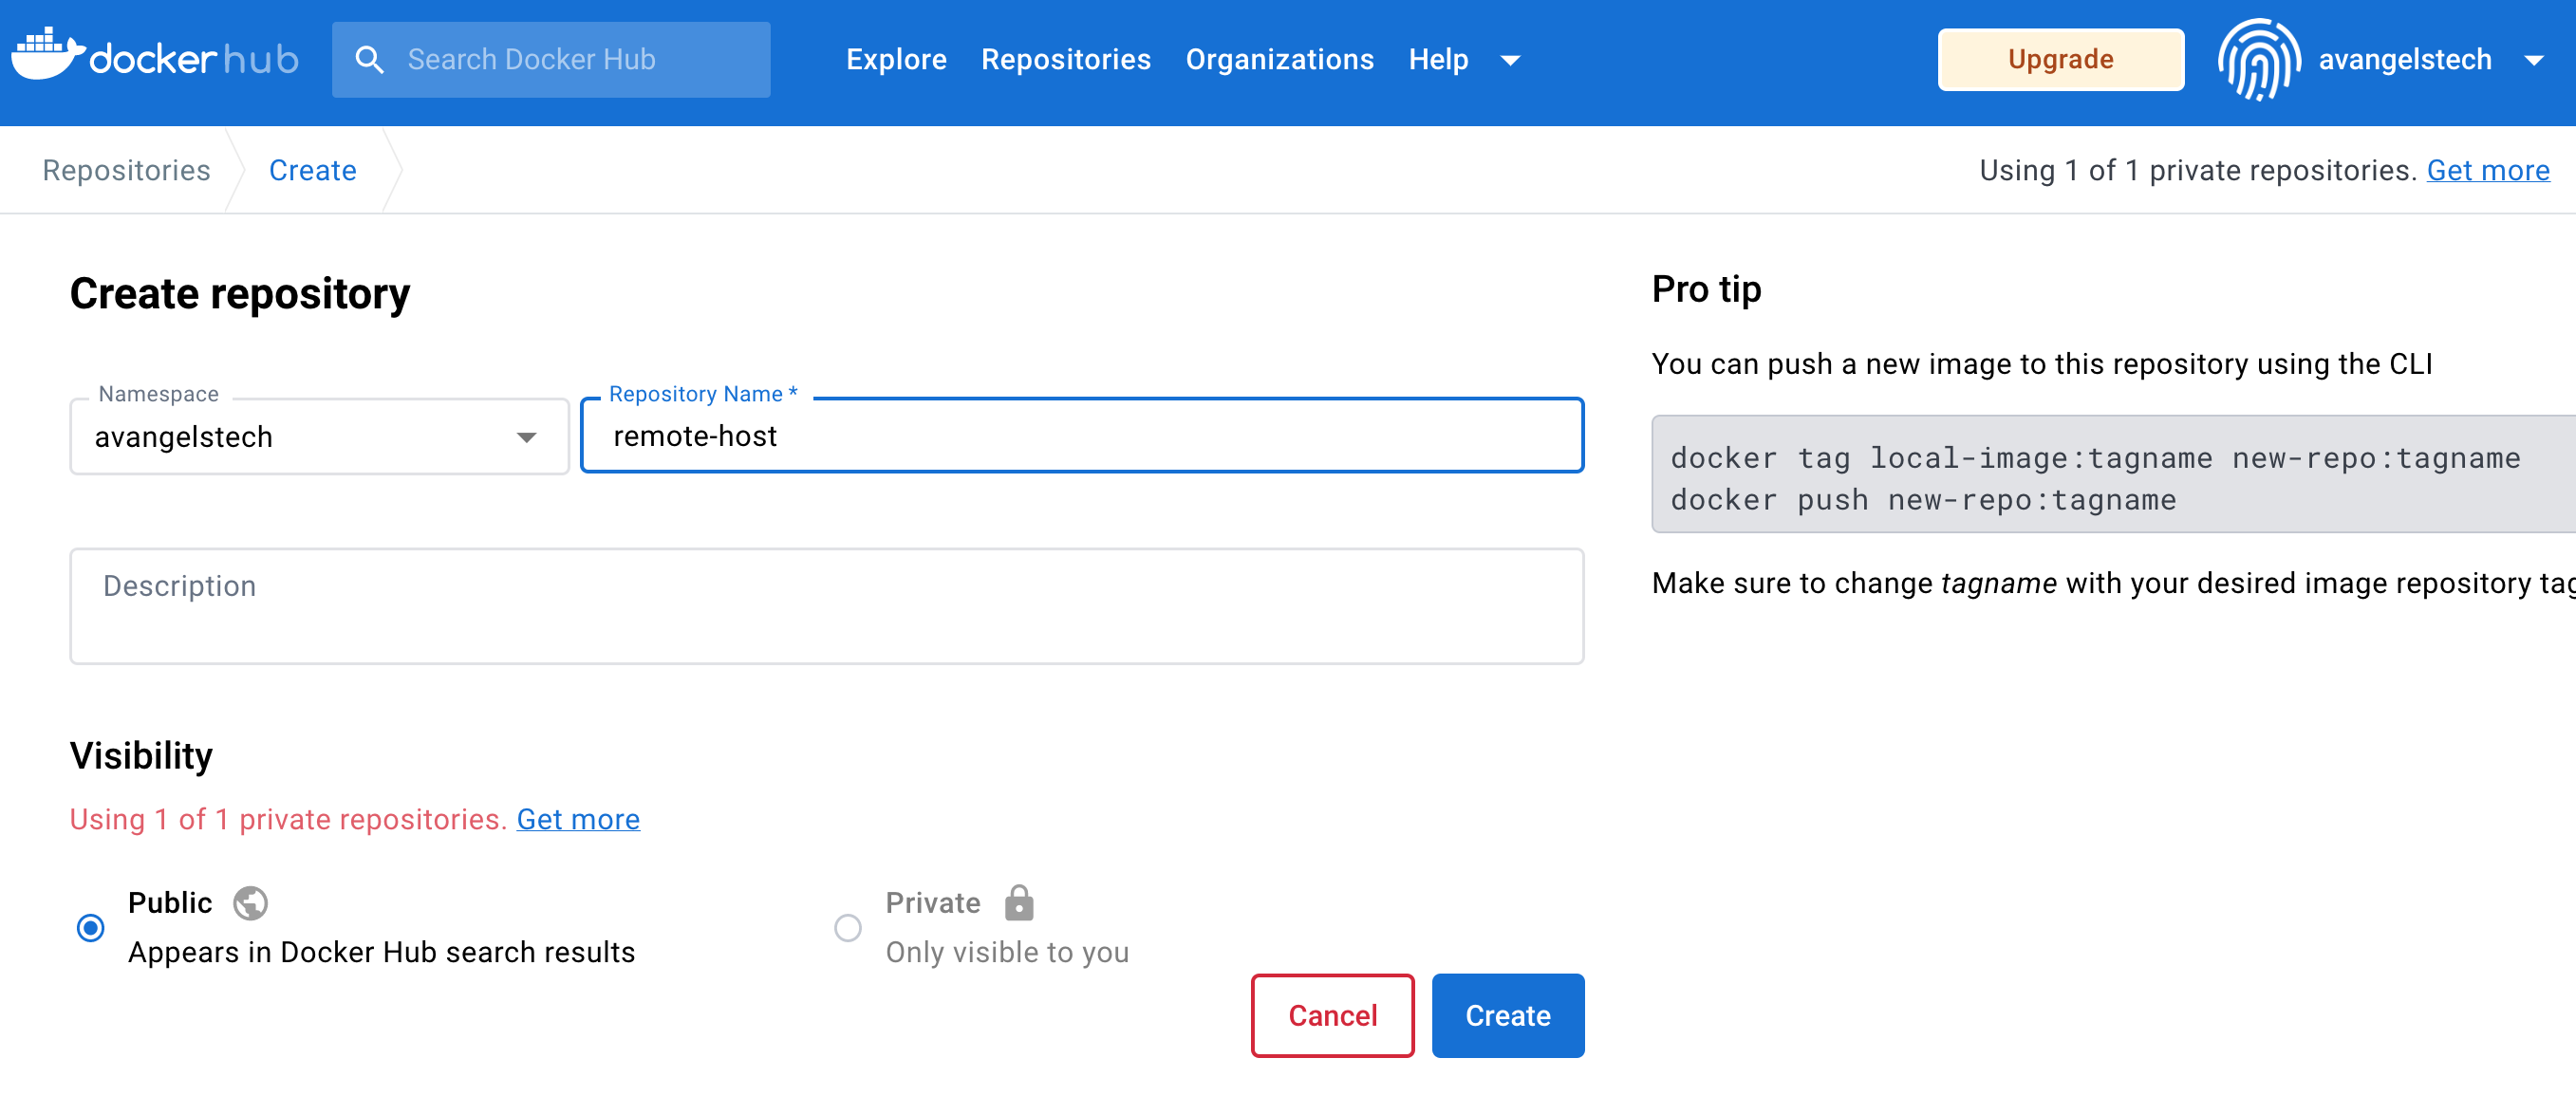
2. Create a New Repository:
- Once logged in, navigate to your Docker Hub dashboard.
- Click “Create Repository.”
- Provide a repository name (e.g., “remote-host”) and set the visibility to “Public.”
- Click “Create.”
Here is a screenshot of the “Create repository” creation process:
3. Push Images to the Docker Hub:
In your terminal, push the images to Docker Hub for the “remote-host” repository:
docker push avangelstech/remote-host:latest
docker push avangelstech/remote-host:1.1
Remember to replace the repository name and tags with your actual values.
Part 2 of the tutorial is now finished, where we crafted our custom Docker image “remote_host” and successfully uploaded it to both AWS ECR and Docker Hub.
In Part 3 of this tutorial, we will deploy the “remote_host” container in our Kubernetes cluster and manually backup the WordPress MySQL database.
PART 3
Comments are closed.