KUBERNETES FUNDAMENTALS
Introduction
In this final instalment of our five-part tutorial on creating customized Docker images, we will complete the integration of our “remote-host” container with Jenkins. This integration is crucial for automating the backup process of our WordPress MySQL database deployed on a Kubernetes cluster.
To recap our progress:
1. We created a custom “remote-host” container specifically for backing up our WordPress database in Part 1 and Part 2
2. In Part 3, we successfully performed a manual backup of the WordPress MySQL database by logging into the “remote-host” pod.
3. Part 4 covered the configuration of essential credentials in Jenkins, including the AWS Secret ID, AWS Secret Key, and MySQL password.
Now, we will focus on modifying the setup of our “remote-host” pod to seamlessly integrate with Jenkins. This final step will allow us to fully automate the database backup process, enhancing the efficiency and reliability of our WordPress deployment.
By the end of this tutorial, you will have a robust, automated system for backing up your WordPress database, leveraging the power of Jenkins, custom Docker images, and Kubernetes.
Let’s begin the final phase of our automation journey.
Part 5
Automating WordPress Database Backups with Jenkins and Custom Docker Images
Step 1: Ensuring Reliable Backup Scripts in Kubernetes with Jenkins
In our 5-part tutorial on creating customized Docker images, we’ve reached a critical step: integrating our “remote-host” container with Jenkins for automated backups of the WordPress MySQL database on our Kubernetes cluster.
Why Store the Backup Script in the “tmp” Directory?
When automating processes through Jenkins, we rely on a shell script (in our case, “my-wp-db-backup-s3.sh”) to define backup parameters and locations. However, if the “remote-host” pod restarts, the script may become unavailable, jeopardizing our backup mechanism.
To address this, we follow these steps:
1. Storage on Worker Node: We store “my-wp-db-backup-s3.sh” in the “tmp” directory on the Worker Node.
2. Persistent Volume (PV) and Persistent Volume Claim (PVC): By creating a PV and PVC, we ensure that the script is permanently mounted on the “remote-host” pod. Even if the pod restarts, the script remains accessible.
Below is an excerpt from the “remote-host-deploy.yaml” file illustrating the volume mounts:
spec:
  containers:
    - image: 123456789012.dkr.ecr.ap-south-1.amazonaws.com/remote-host:1.1
      name: remote-host
      ports:
        - containerPort: 22
      volumeMounts:
        - name: remote-host-script
          mountPath: "/home/jenkins/remote-host-data-files/my-wp-db-backup-s3"
          subPath: my-wp-db-backup-s3.sh
        - name: remote-host-tmp
          mountPath: "/tmp"

  volumes:
    - name: remote-host-script
      persistentVolumeClaim:
            claimName: remote-host-pvc
    - name: remote-host-tmp
      persistentVolumeClaim:
            claimName: remote-host-pvc-tmp
By following this approach, our automated Jenkins backup job remains robust and reliable, even in the face of pod restarts.
Step 2: Creating a Jenkins Job for Automated Backups
In our tutorial, we’ve reached the point where we need to set up a Jenkins job to automate backups. But first, let’s revisit our “my-wp-db-backup.sh” shell script:
#!/bin/bash
DB_HOST=$1
PASSWD=$2
DB_NAME=$3
AWS_ACCESS_ID=$4
AWS_SECRET=$5
AWS_DIR=$6

DATE=$(date +%d%m%y-%H%M%S)
BACKUP=my-db-backup-$DATE.sql

mysqldump -u root -h $DB_HOST -p$PASSWD $DB_NAME > /tmp/$BACKUP &&\
export AWS_ACCESS_KEY_ID=$AWS_ACCESS_ID &&\
export AWS_SECRET_ACCESS_KEY=$AWS_SECRET &&\
export AWS_DEFAULT_REGION=ap-south-1
echo "Uploading ..."

aws s3 mv /tmp/$BACKUP s3://$AWS_DIR/$BACKUP
This script requires three parameters and three secret credentials (already specified in Step 3: Part 4 of the tutorial). Now, let’s create the Jenkins job:
1. Navigate to Jenkins Dashboard:
- Click “Dashboard.”
- Select “New Item.”
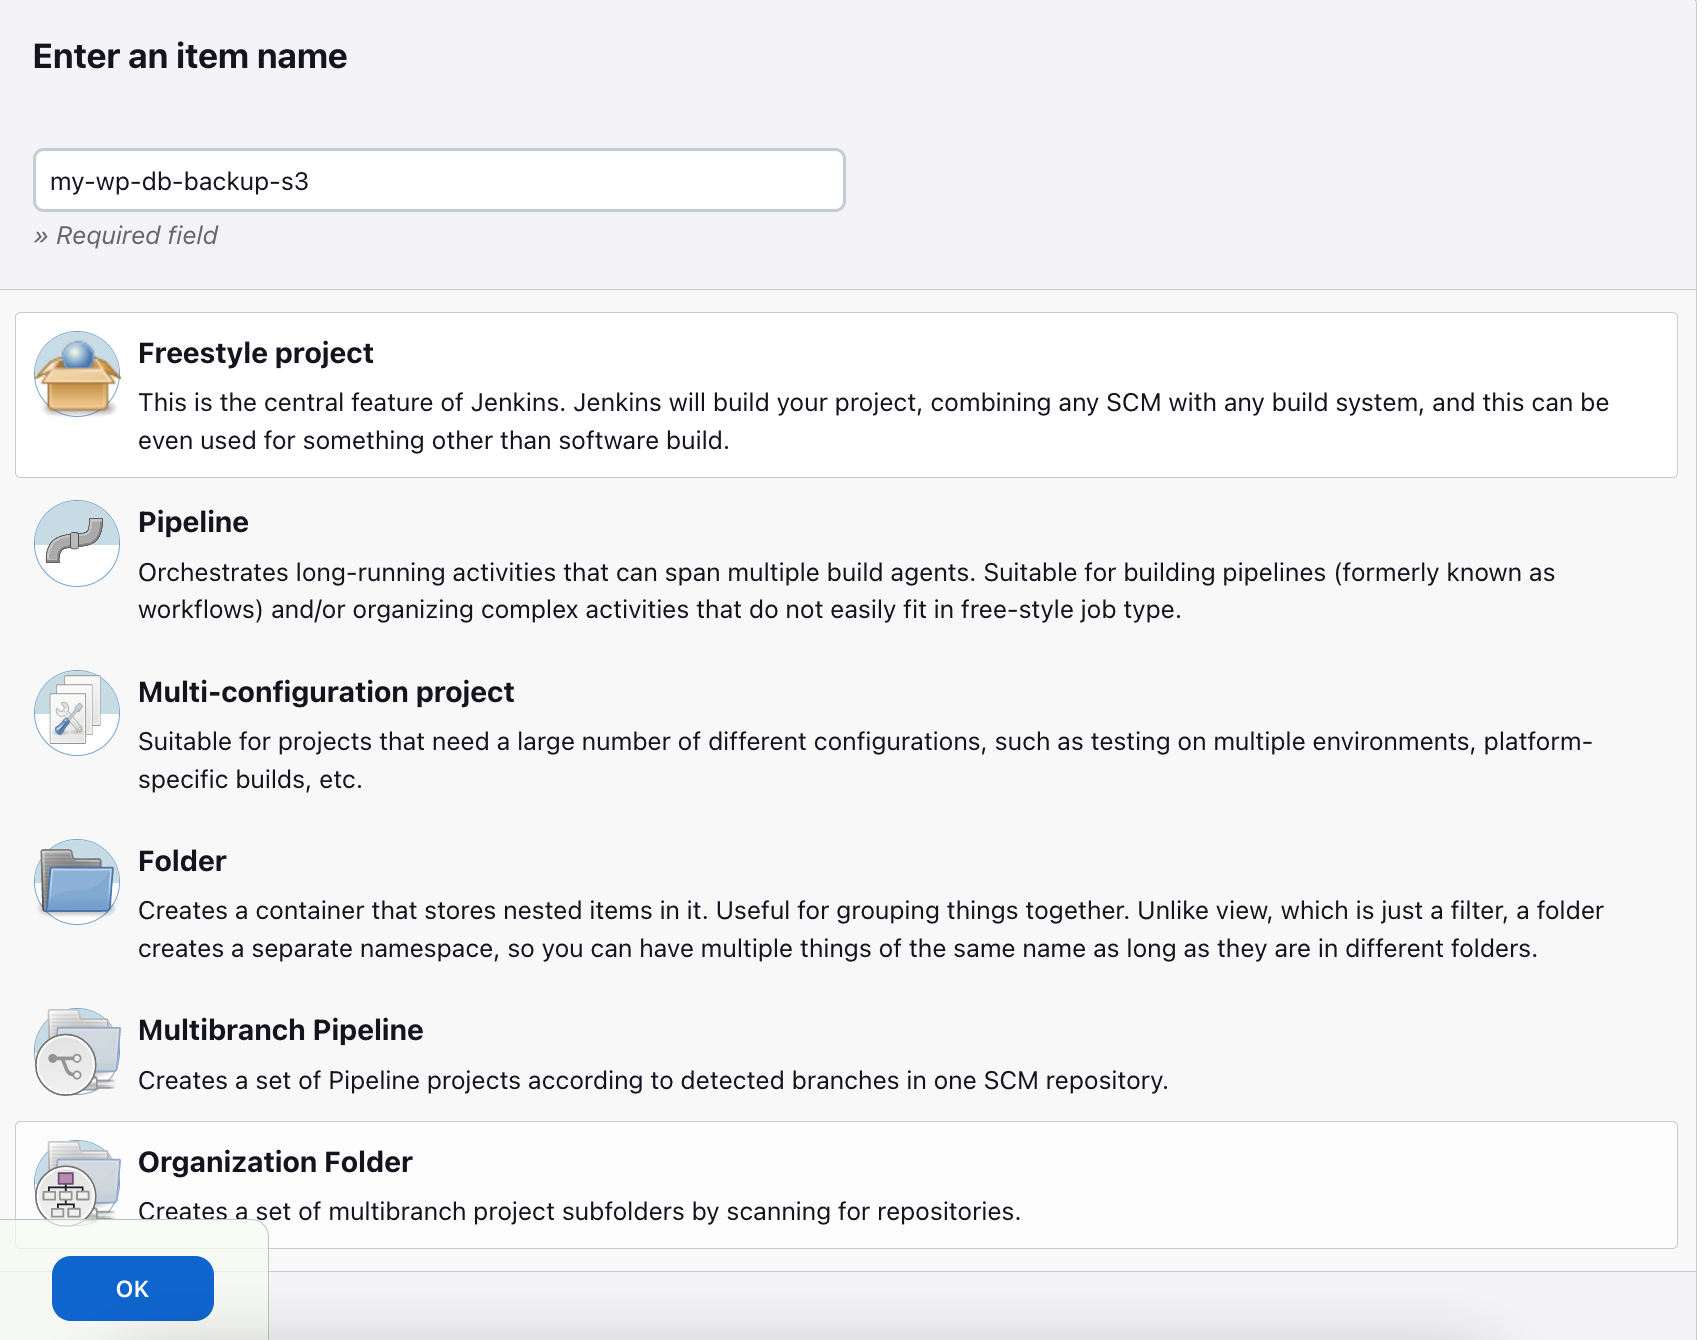
2. Create a Freestyle Project:
- Name it “my-wp-db-backup-s3.”
- Choose “Freestyle project.”
- Click “OK.”
And there you have it! Your Jenkins job is ready to handle automated backups. Feel free to adjust any additional settings as needed.
Below is a screenshot of the Jenkins job
Once the “job” or “project” is created it opens a “Configure” page.
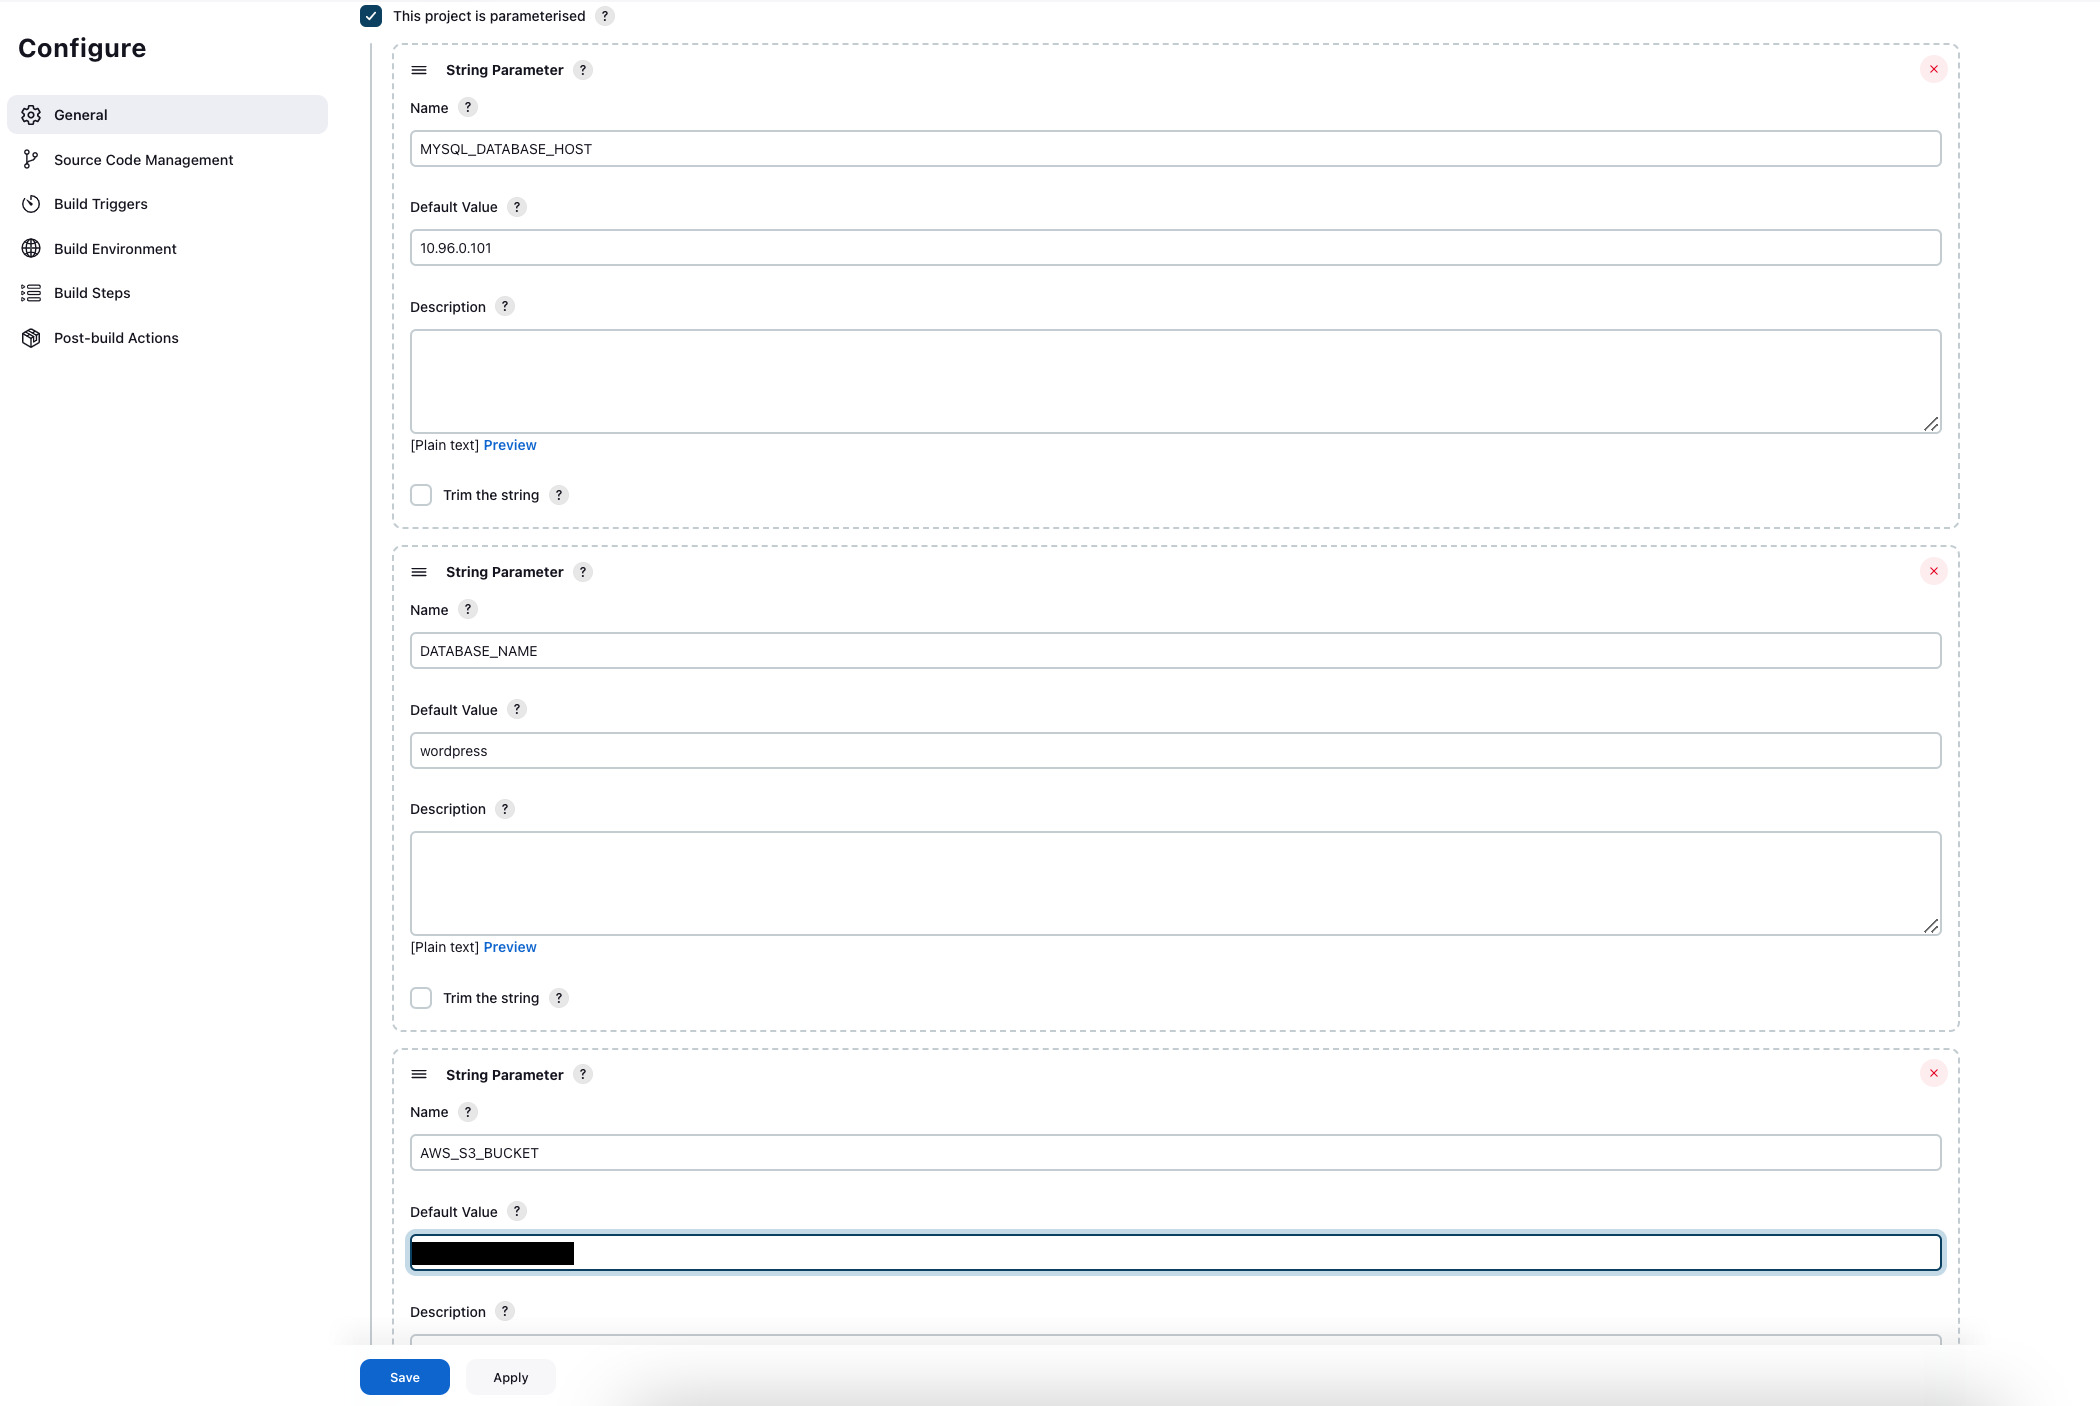
Step 3: Configuring Jenkins Parameters for Backup Automation
To ensure smooth backup automation, we’ll configure three essential parameters in Jenkins. Remember that the parameter names defined in the script and in Jenkins don’t need to match; only the order matters.
1. MYSQL_DATABASE_HOST:
- Provide any descriptive name.
- Default value:
10.96.0.100(Use the ClusterIP of the MySQL service as the hostname.)
2. DATABASE_NAME:
- Specify the name of the database to be backed up.
- Default value:
wordpress.
3. AWS_S3_BUCKET:
- Name the S3 bucket where backups will be stored.
- Default value:
mywp-backup-10apr23(This bucket was created in Step 4: Part 3).
Navigate to your Jenkins configuration, set up these parameters, and ensure a seamless backup process!
Below is a screenshot of the Jenkins “Configure page”
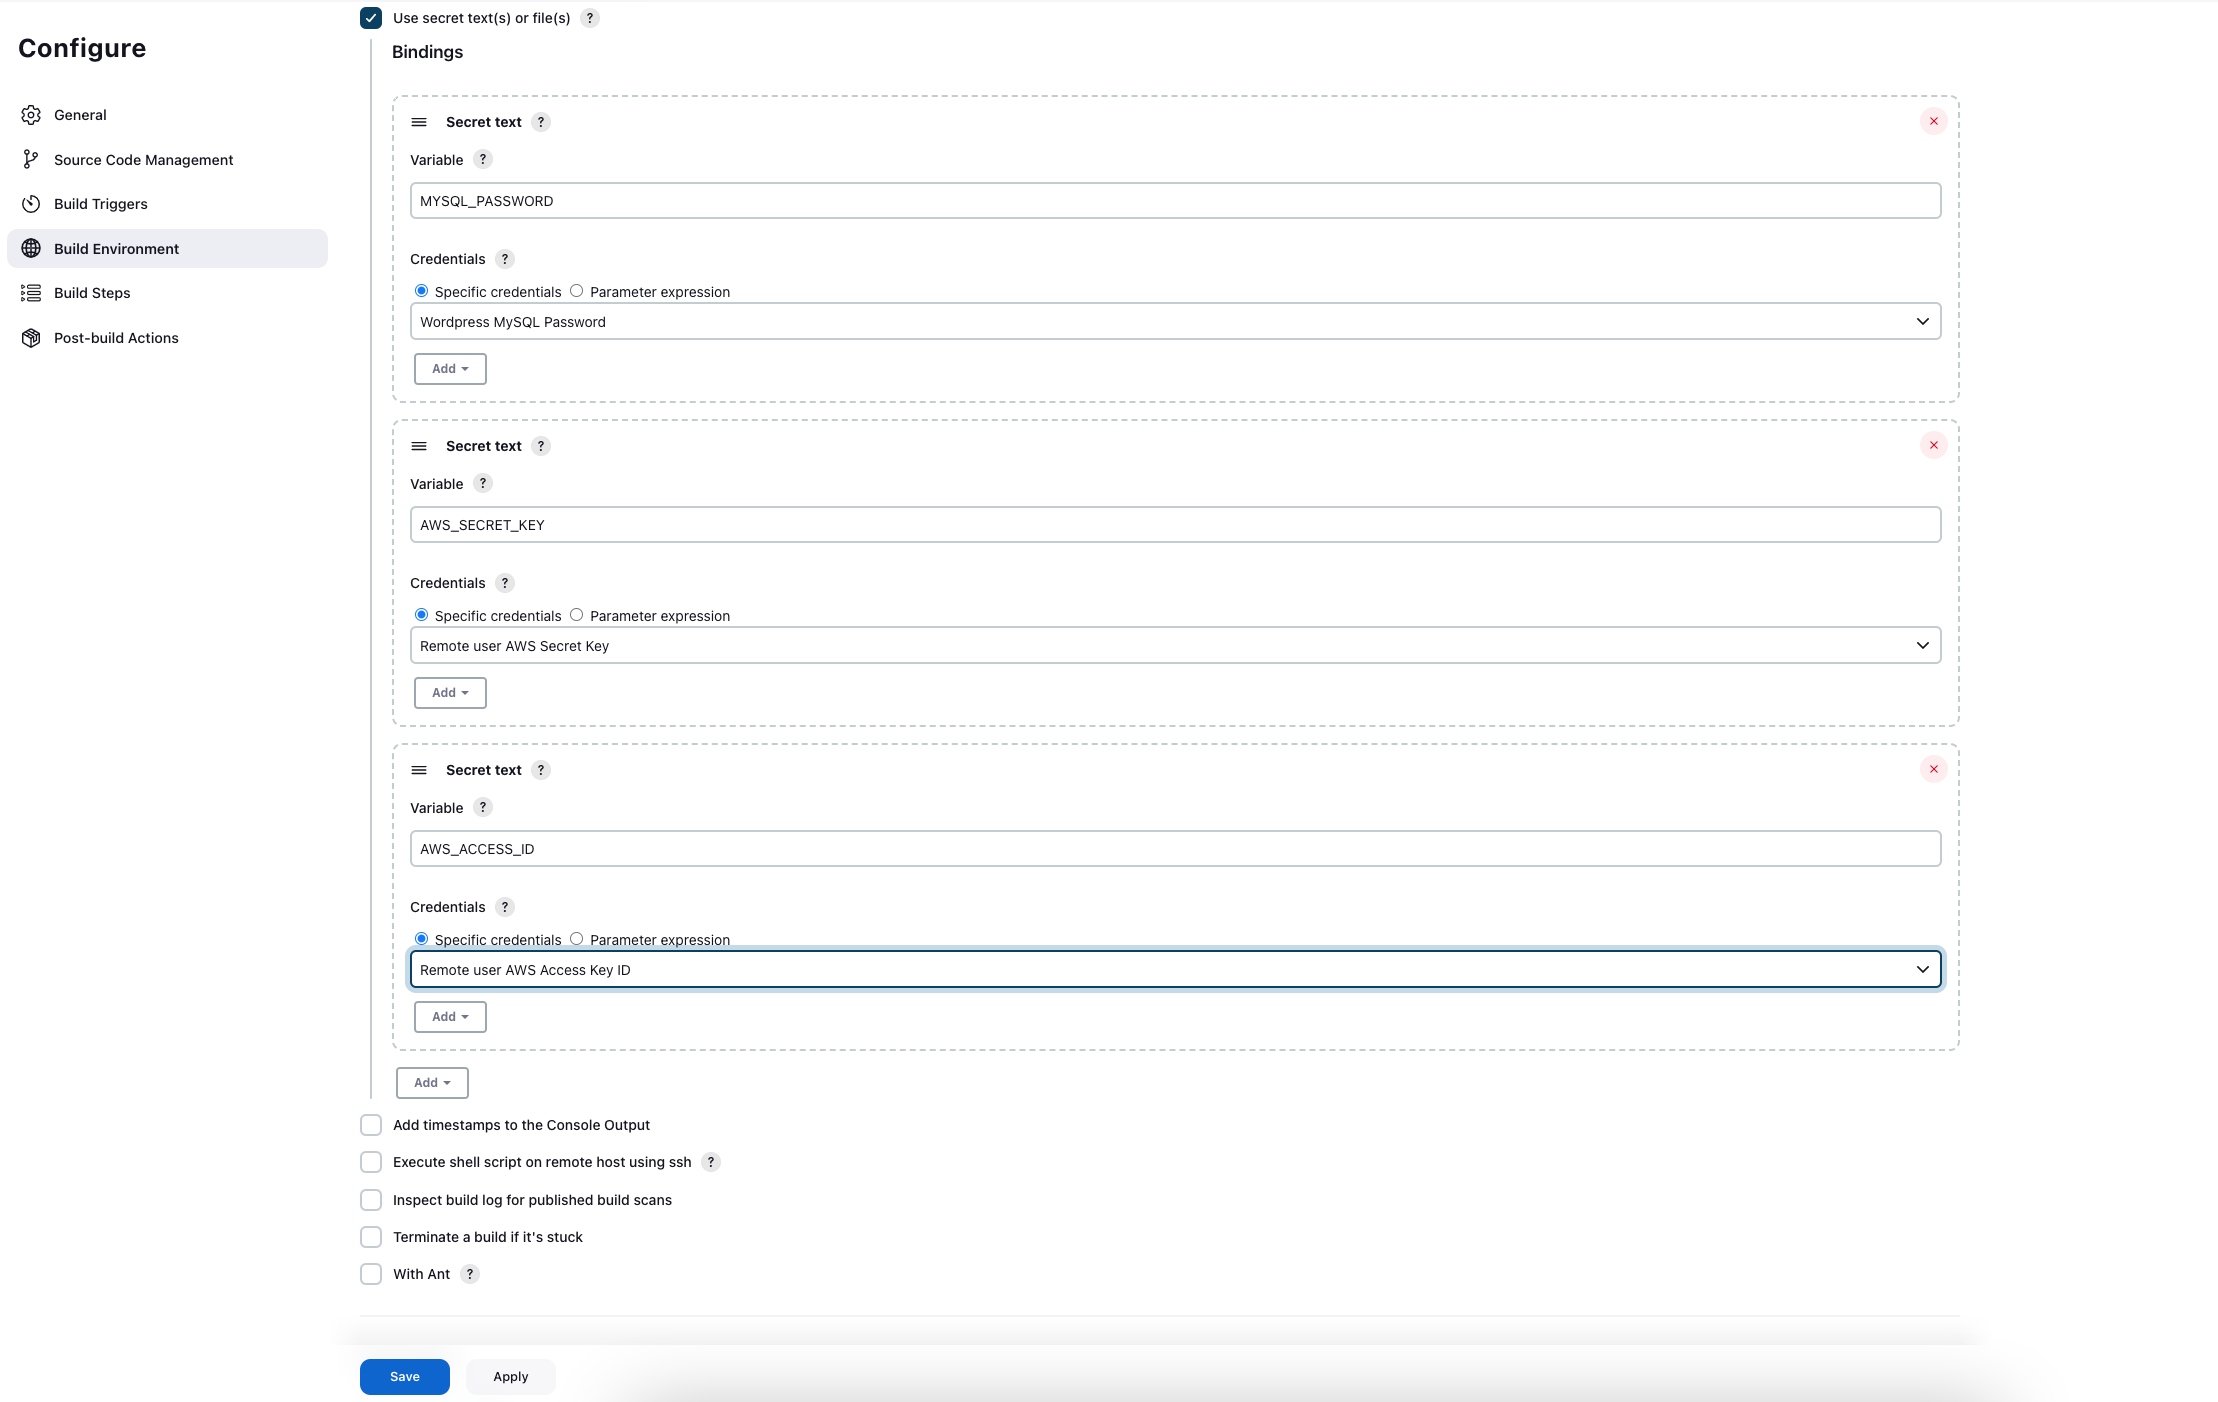
Step 4: Configuring Secret Credentials in Jenkins
In this step, we’ll set up the secret credentials required by our shell script within Jenkins. These credentials correspond to the parameters defined earlier.
1. MYSQL_PASSWORD:
- Select the secret MySQL database password created in Step 3: Part 4.
- Bind it to the variable “MYSQL_PASSWORD”
2. AWS_SECRET_KEY:
Choose the secret AWS secret key created in Step 3: Part 4.
Bind it to the variable “AWS_SECRET_KEY”
3. AWS_ACCESS_ID:
Pick the secret AWS access ID created in Step 3: Part 4.
Bind it to the variable “AWS_ACCESS_ID”
Navigate to the Jenkins configuration, set up these secret credentials, and ensure a secure and seamless backup process!
Below is a screenshot of the secret credentials.
Executing the Backup Shell Script via Jenkins
Now that we’ve configured the necessary parameters and secret credentials in Jenkins, let’s execute our shell script. Follow these steps:
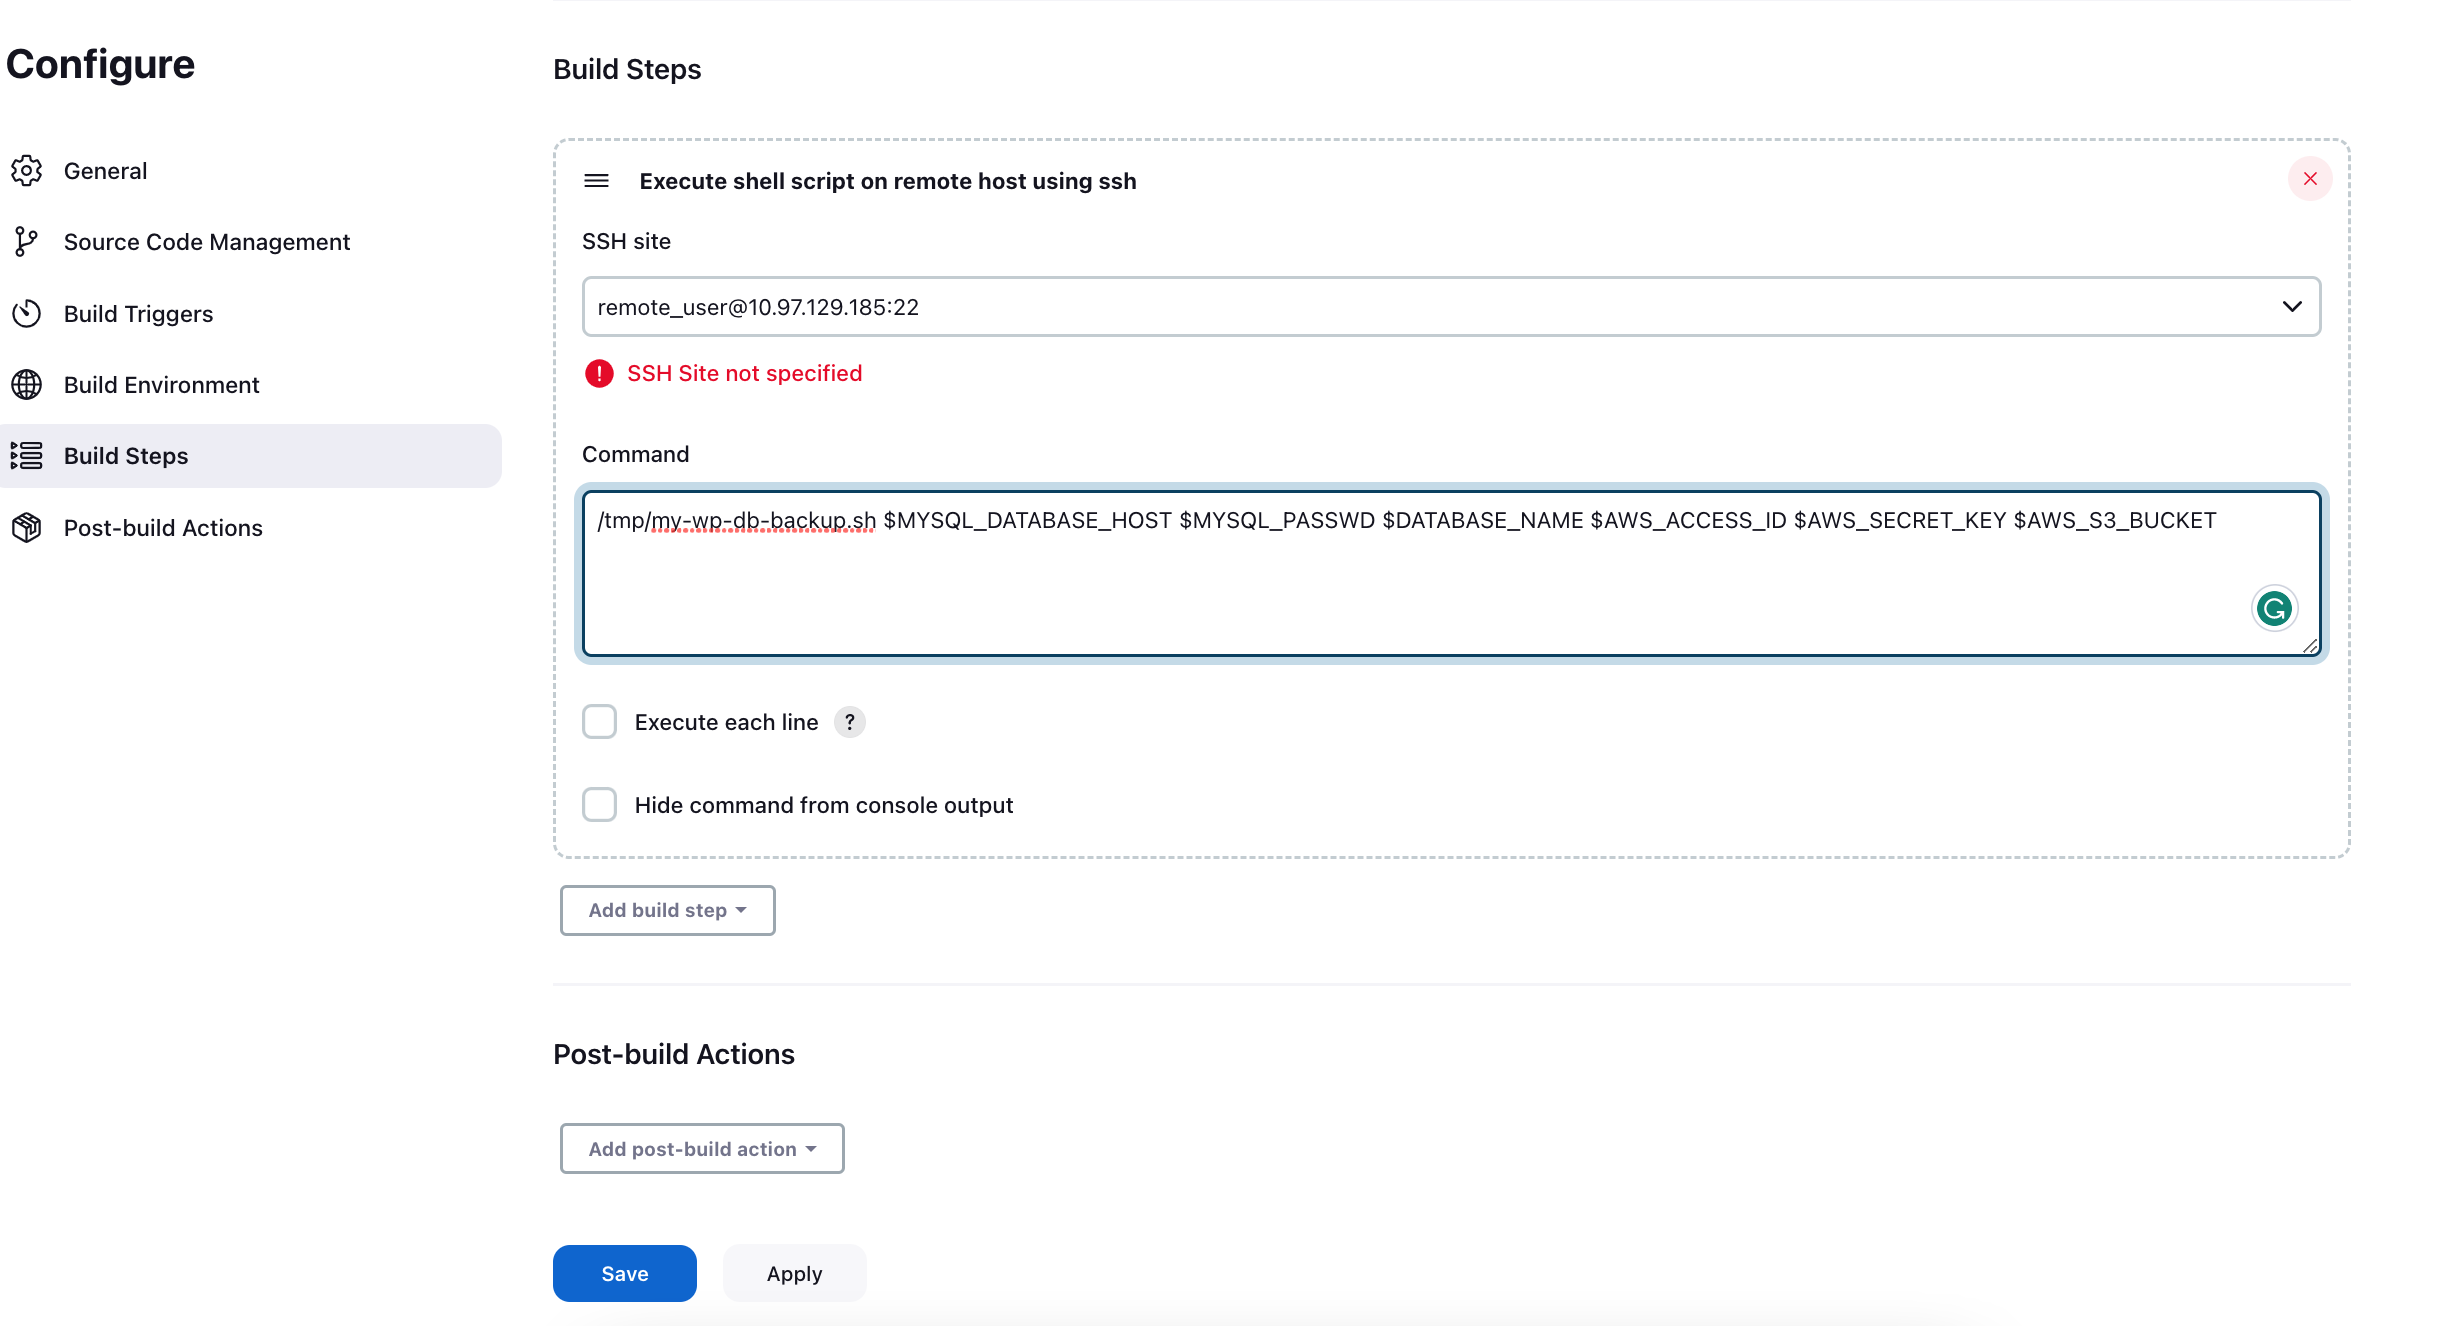
1. Navigate to the “Build Steps” section.
2. Choose “Execute shell script on remote host using SSH.”
3. Configure the SSH site (e.g.,
remote_user@10.97.129.185:22).4. Enter the following command:
/tmp/my-wp-db-backup.sh $MYSQL_DATABASE_HOST $MYSQL_PASSWD $DATABASE_NAME $AWS_ACCESS_ID $AWS_SECRET_KEY $AWS_S3_BUCKETThis command aligns with our shell script “my-wp-db-backup.sh” where each parameter corresponds as follows:
$MYSQL_DATABASE_HOST: MySQL database host
$MYSQL_PASSWD: MySQL password
$DATABASE_NAME: Name of the database to be backed up
$AWS_ACCESS_ID: AWS access ID
$AWS_SECRET_KEY: AWS secret key
$AWS_S3_BUCKET: S3 bucket for storing backups
Remember, this is for reference, and you can adjust it as needed for your specific setup.
Below is a screenshot of the Build step
Click “Save“
Step 5: Building the Jenkins Job
In this final step, we’ll execute our Jenkins job and verify that everything works seamlessly. Follow these steps:
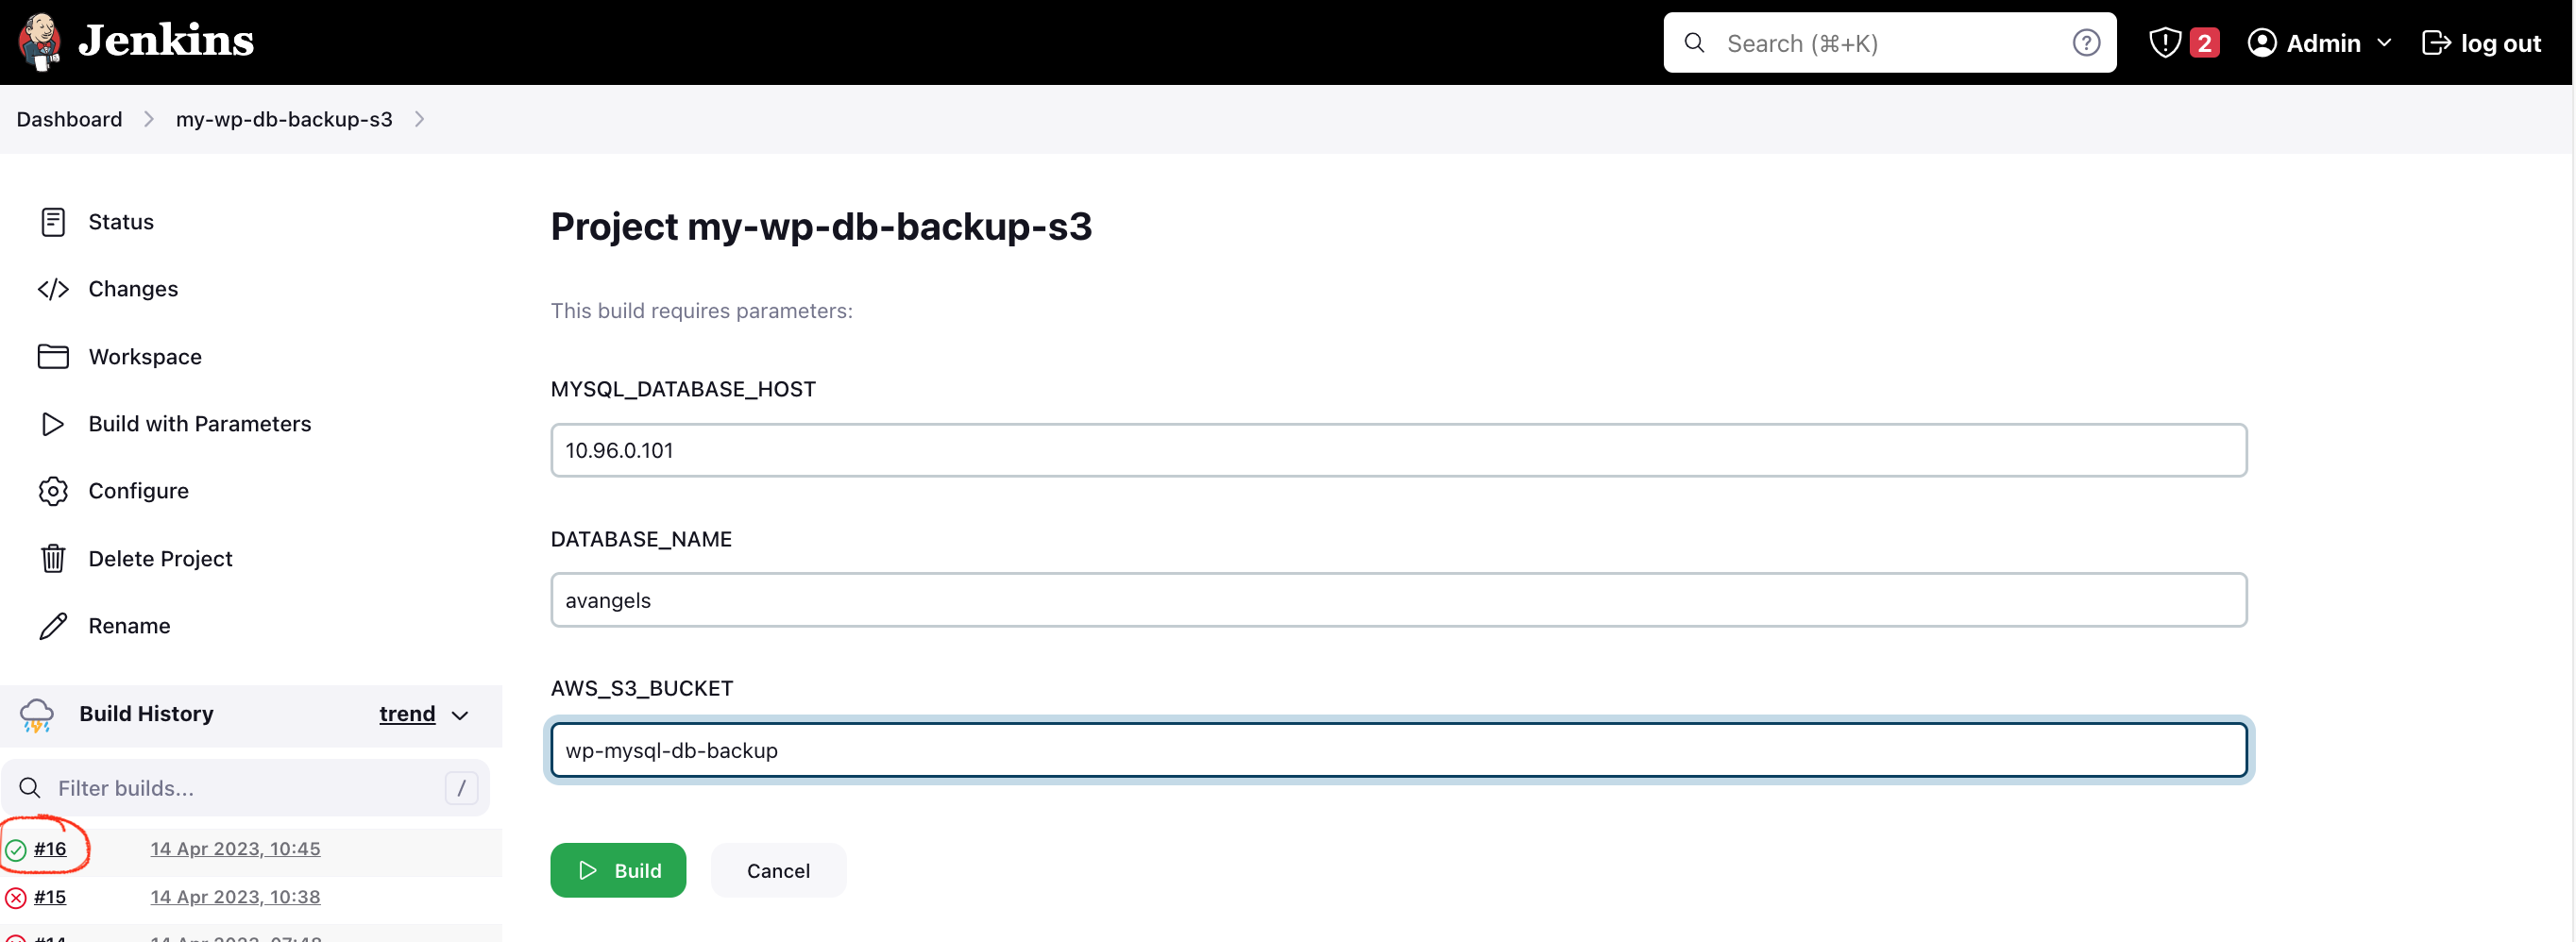
1. Navigate to the Jenkins home page.
2. Locate your project or job (in our case, “my-wp-db-backup-s3”).
3. Click on the job to open its details page.
4. Click “Build with parameters”
5. The default parameters will be pre-populated based on our previous configuration. Adjust them if needed.
6. Click “Build”
And there you have it! Jenkins will now execute the backup process. Feel free to modify parameters as necessary for different databases or S3 buckets.
Below is a screenshot of the project with build parameters.
Verifying Jenkins Build Results
After clicking the “Build” button, follow these steps:
1. Locate the build number associated with your project or job.
2. Click on the build number.
3. Review the console output to check for success or failure.
4. If there’s a failure, the reason will be mentioned, allowing for necessary adjustments.
Navigate to:
Dashboard → “my-wp-db-backup-s3” (project or job) → Build number → Console Output
Below is a screenshot of the Jenkins build page.
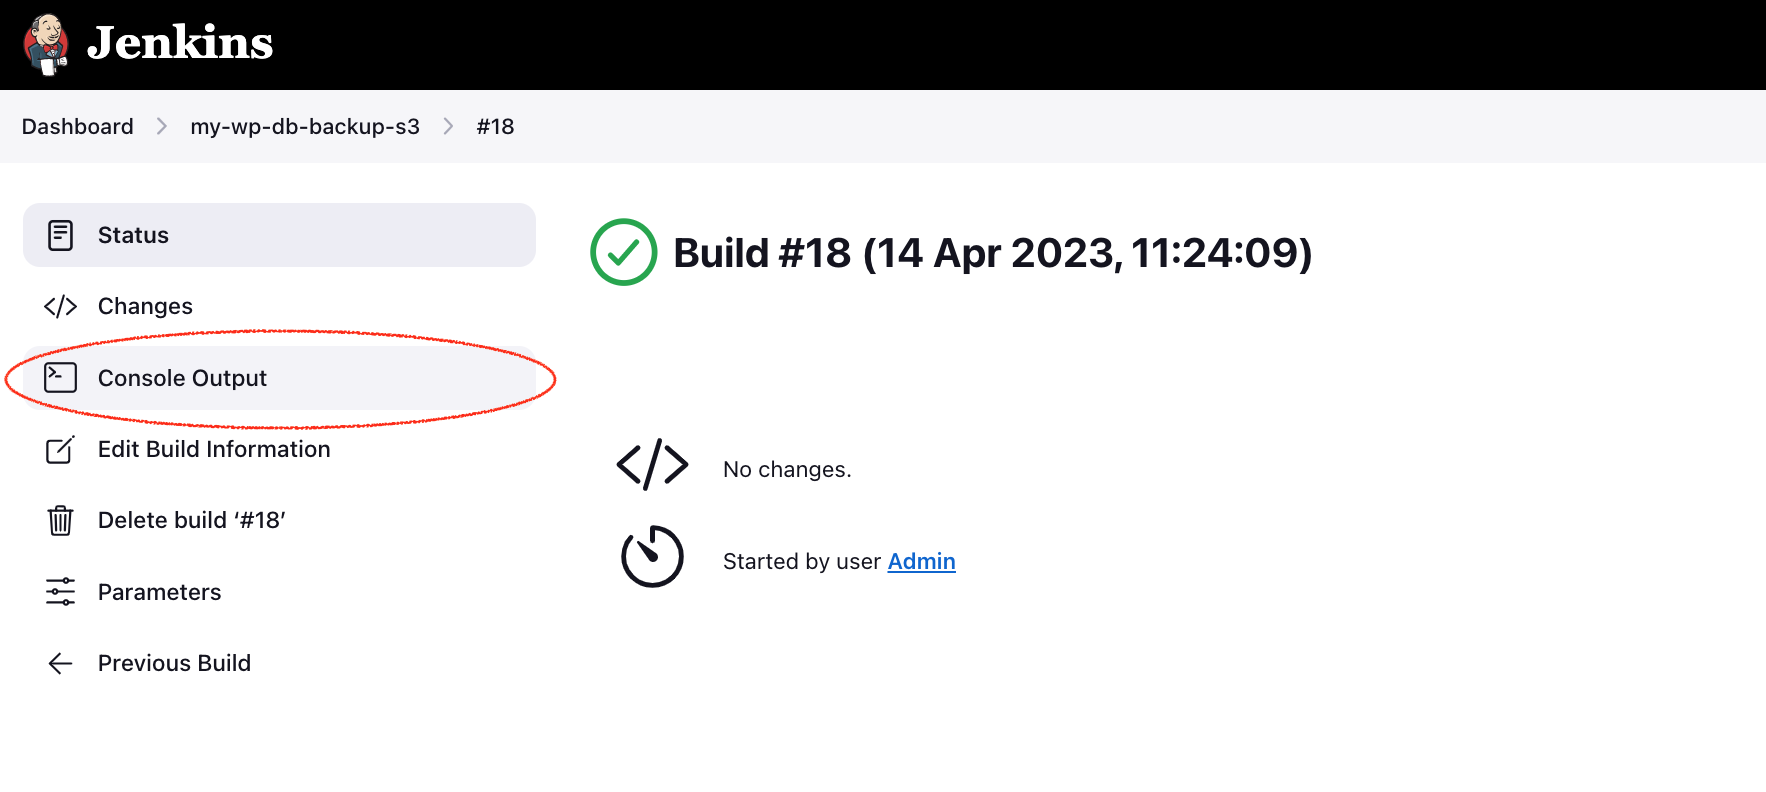
After clicking the “Console Output” follow these steps:
1. Locate the build status.
2. If there are errors, resolve them.
3. For a successful build, the console output will display:
[SSH] completed
[SSH] exit-status: 0
Finished: SUCCESS
Proceed to the final step of the tutorial only if the build is successful.
Step 6: Automating Backups with Jenkins Using Cron
While we’ve manually triggered our Jenkins job so far, true automation requires scheduled backups without user intervention. Jenkins provides a “cron”-like feature for precisely this purpose.
1. Cron Syntax:
- Refer to this link for the correct syntax based on your backup requirements.
- In our case, we’ll configure daily backups of our WordPress MySQL database at 01:30 AM using the following cron expression:
30 1 * * *
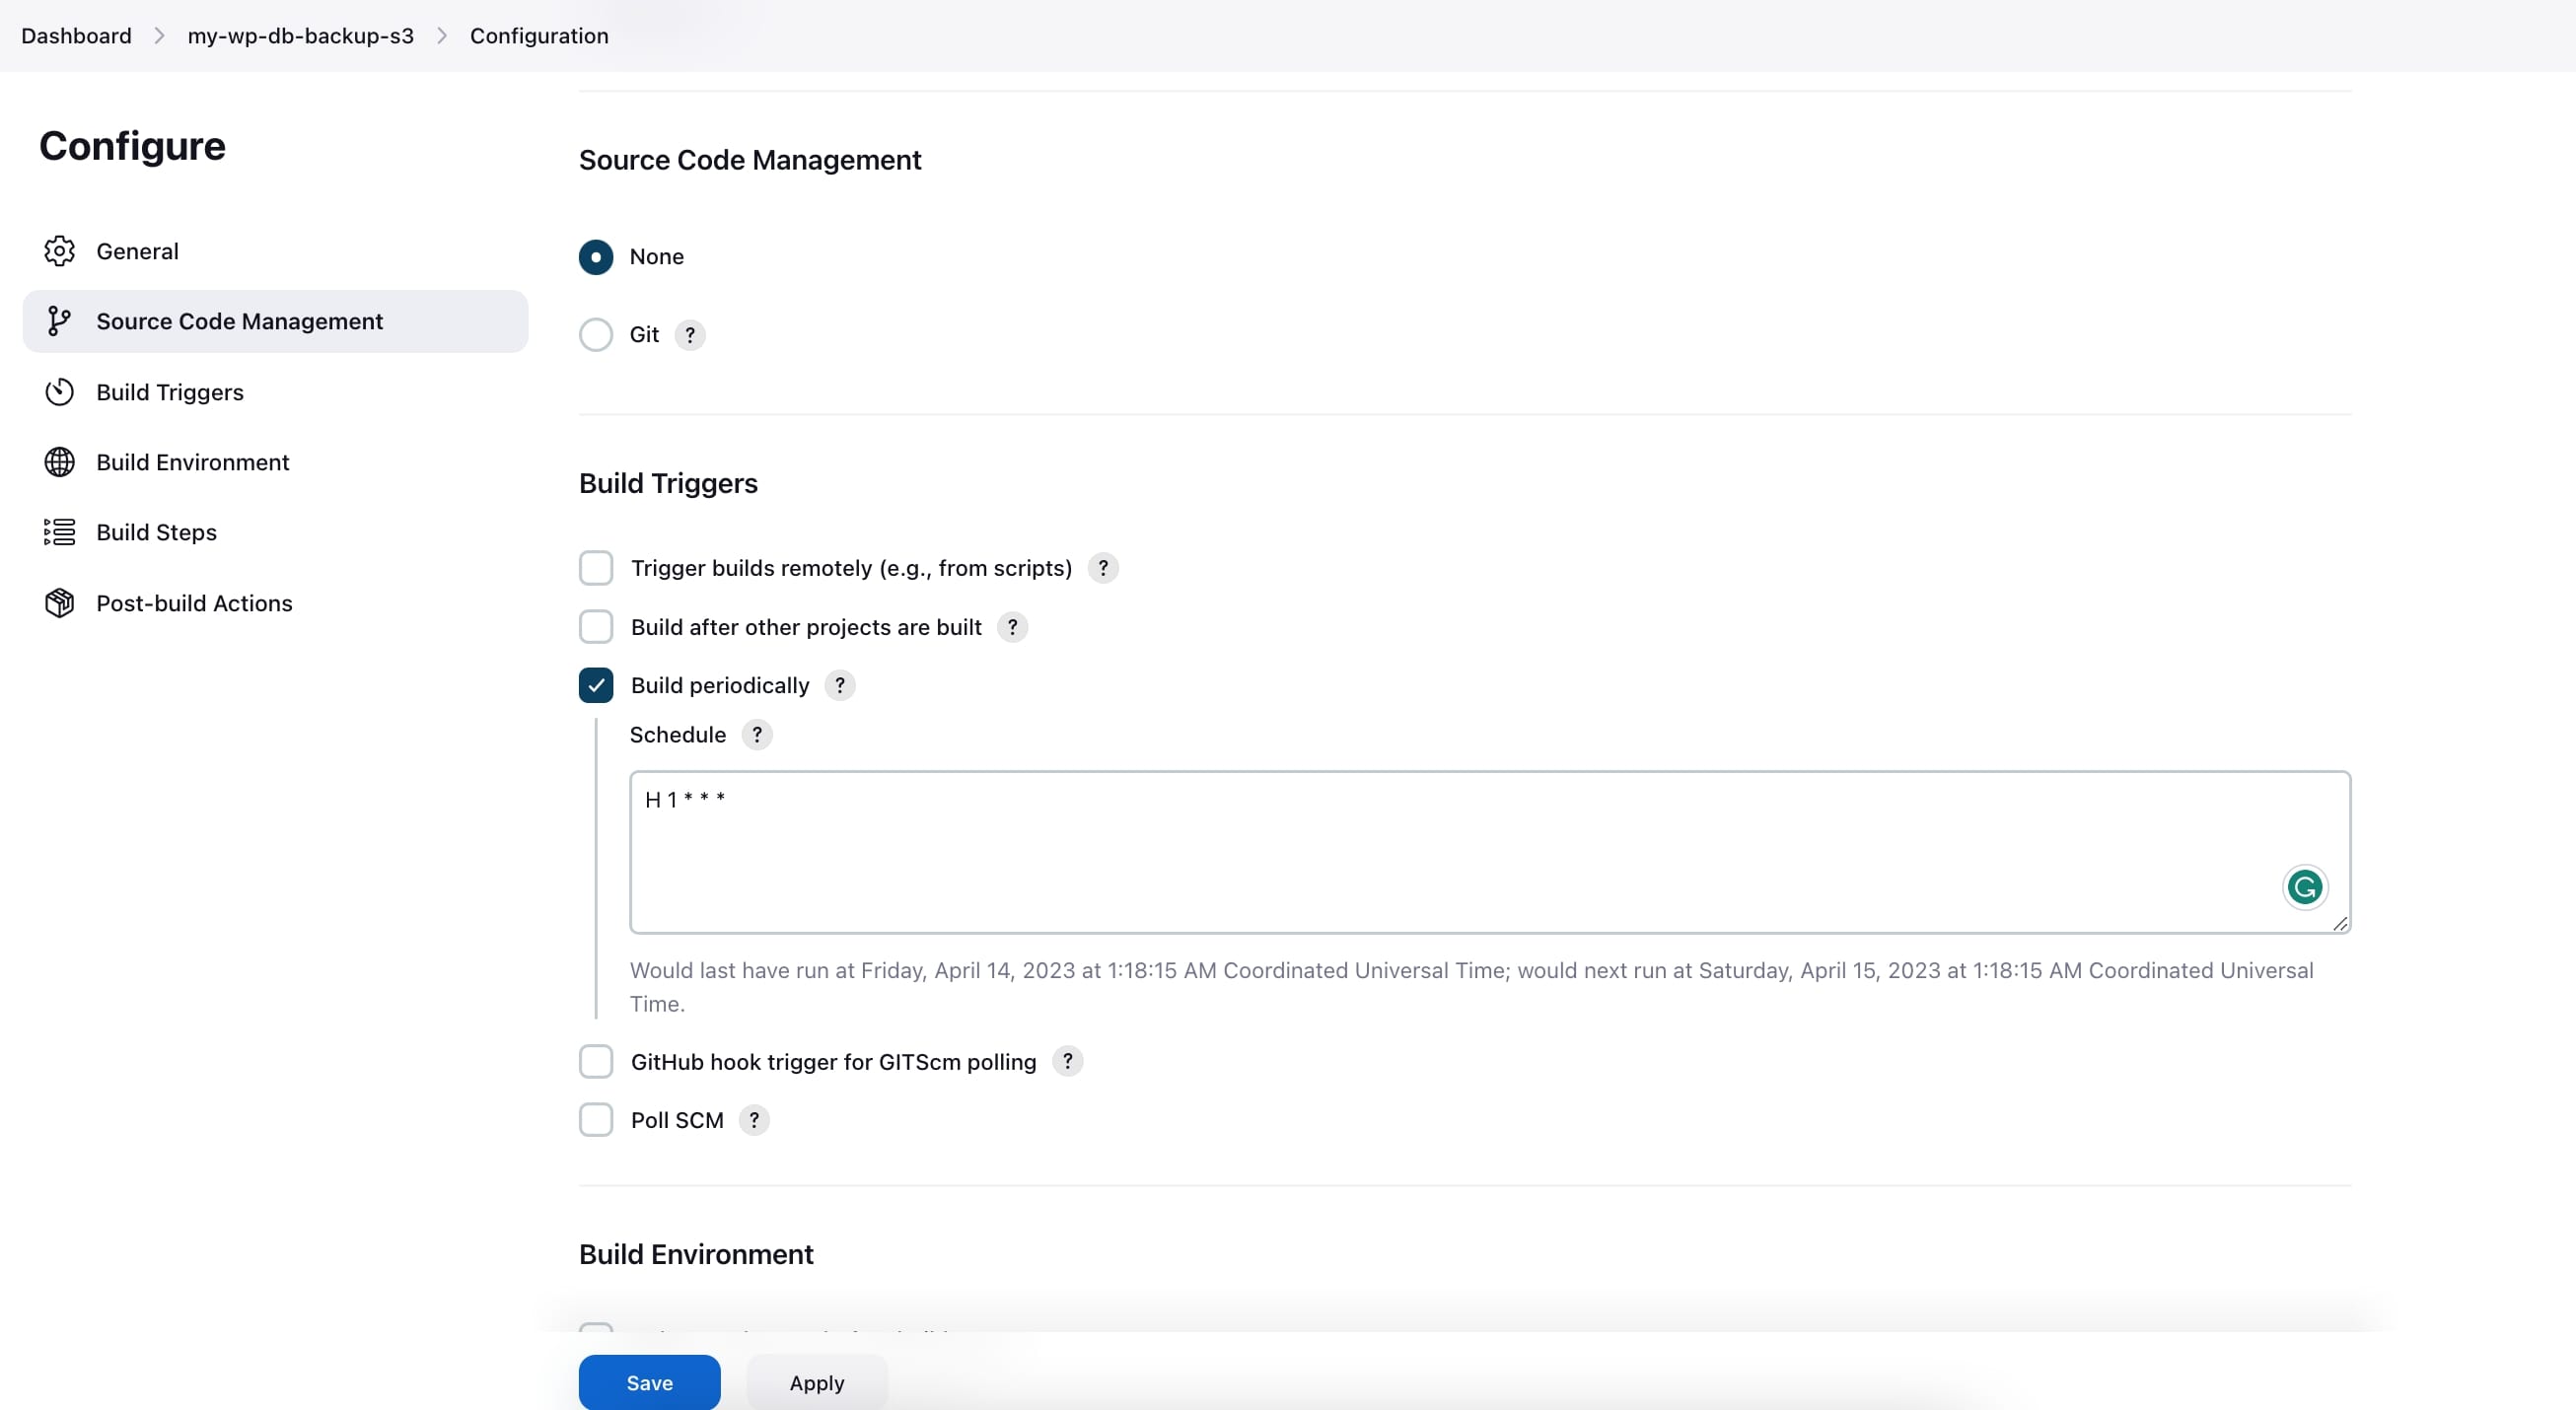
2. Configuration:
- Navigate to your Jenkins dashboard.
- Open the project (“my-wp-db-backup-s3”).
- Go to “Configure.”
- Under “Build Triggers,” select “Build periodically.”
- Enter the cron expression.
- Click “Save.”
Jenkins recommends modifying the value to evenly distribute loads. Consider using the expression:
"H 1 * * *".
Below is a screenshot of the configuration.
Conclusion
Automating MySQL Backups with Jenkins
By configuring Jenkins to execute automated backups at specific intervals, you’ve achieved a robust solution for safeguarding your WordPress MySQL database. This setup can be extended to multiple databases or other data sources by installing the relevant client tools within your “remote-host” container.
Congratulations on successfully creating and integrating your container into a Kubernetes cluster alongside WordPress and Jenkins. Your automated backup process is now in place!